A/B Test Settings
Edits you can make after creating your A/B test
You can access the Overview tab from all environmentsHowever, editing the settings in the overview tab is only possible in the production environment.
Registration of test devices is possible to set for experimentation in both environments.
Summary
This is the first tab when entering the Overview tab in the Production Environment.
Here, you can manage test groups set up for A/B testing, and also manage test devices.

Overview tab
A/B Test Hypothesis
Enter or modify the hypothesis you want to experiment with through A/B testing.
A/B Test Groups
Editing test groups
Test group editing is only possible before starting the A/B test.You can create up to 10 test groups (test group J) per experiment.
Click the Edit button for the Test Groups menu on the A/B test. Here you can add/delete test groups for your A/B test. You can also change the tet group descriptions.
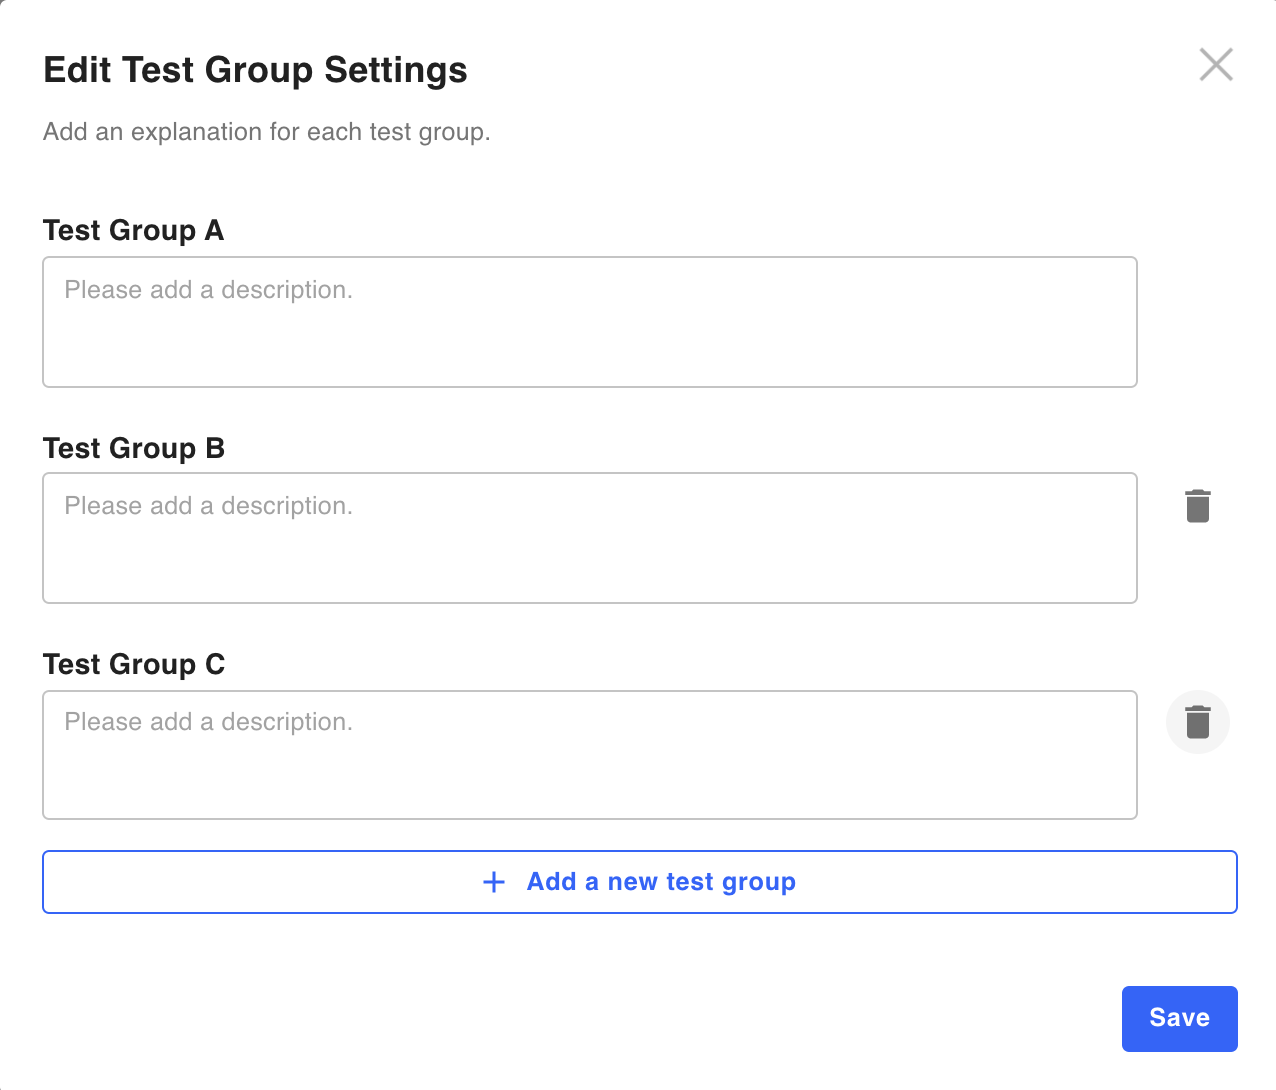
- Add: You can add a new group by clicking the
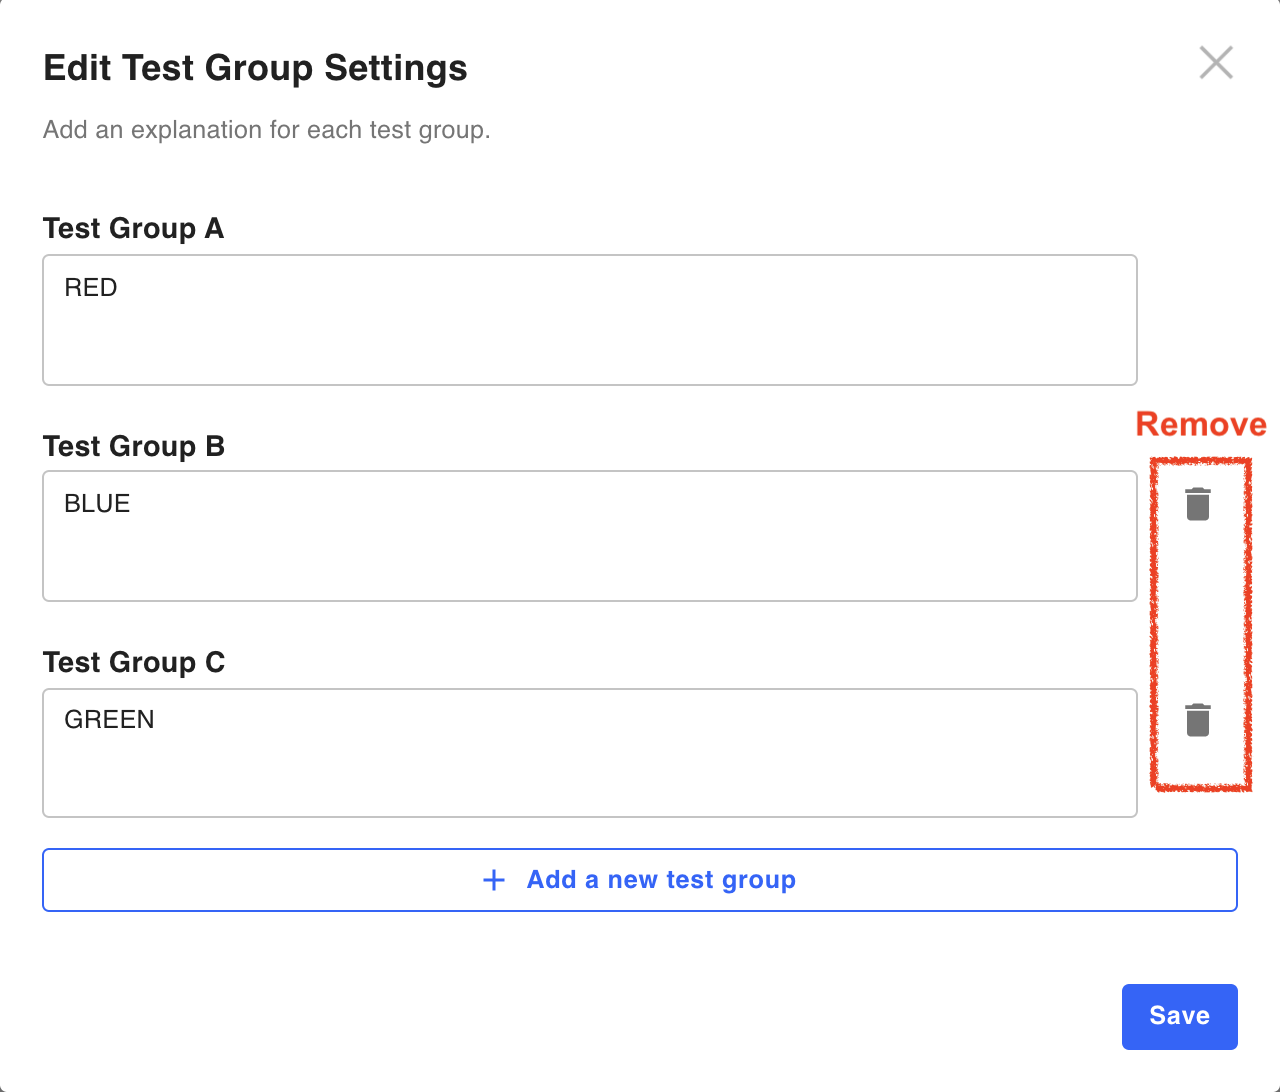
Add a new test groupbutton at the bottom of the dialog. - Delete: Click the trash can icon to the right of the group you want to delete. However, in the case of deletion, the trash can icon appears only when there are 3 or more groups.
- Reflect changes: After completing group addition/deletion, you must click the
Savebutton at the bottom right of the dialog to reflect the changes.
Remove specific test groups from ongoing A/B tests
If an A/B test is already in progress and there are 3 or more test groups, you can remove a specific group by clicking the Edit button on the right. Users previously included in the removed test group will then see the version shown to test group A (functions, screens, logic, etc.).
The removal function is used when it is determined that experimenting with a specific version/test group is unnecessary. For example, if a specific test group's results are clearly inferior to other groups, you can use the Remove function to prevent users from being exposed to that test group from that point onwards.
Register test device
By registering a user identifier for a specific test group, you can manually allocate the desired user to be exposed to a specific test group.
Those users are classified as manually assigned users when distributing the test group.
Use Cases
This user allocation function can be used during A/B testing in a production environment for Quality Assurance (QA) purposes before starting A/B testing in production.
Typical use cases include:
- Checking whether the UI, function, logic, etc., are being reflected and applied in each variation for each test group as intended
- Verifying that there is no other problem that occurs with other functions in the service/product unrelated to A/B testing
If you want to conduct the A/B test for only a designated amount of users set the traffic allocation to 0% in the production environmentIf you set the traffic allocation to a value greater than 0% in the production environment, unregistered and unintended users may be assigned to a group other than test group A for both production and development environments.
This is because the traffic allocation value of the production environment is also applied to the development environment, and if the traffic allocation value exists, unregistered users may be allocated to other test groups.
Therefore, if you do not want users other than registered users to be exposed to the "treatment" test groups (test group B,C,D..), you should set the traffic allocation to 0.
How to register
Test device properties are environment-independent, and the settings in development and production environments are not compatible with each other. This means that even for the same A/B test, you need to register test devices for each environment.
1. Enter the user identifier value
If you press the Register Device ID button on the right, a pop-up dialog will appear.
Once you have decided which test group you want to assign the user to, enter the User Identifier Value in the text box for that test group and press the Enter key.
- To delete a specific registered user, click the
xbutton to the right of each device ID. - To delete all registered users, click the
xbutton located to the right of the input field for the relevant test group.
2. Save
Click the 'Save' button located at the bottom right of the dialog to save the changes.
3. Check
After completing the SDK integration with the Hackle platform, check to see if the user identifiers saved in each group are being allocated to the intended test group and the right content is displayed for each test group.
Facing problems regarding individual user allocation?
JavaScript SDK caches the settings due to user latency. Therefore, it may seem like the user is not being allocated properly. In this case, you can immediately see the hard refresh function of the Chrome browser.
If this does not work, open the developer tool, right-click on the refresh button, and then click on the cache and conduct hard refresh.If you are working with a mobile app, you must shut of the app completely and restart in order to check the results.
Updated 17 days ago