SDK Integration
This document provides steps for integrating your Node.js app via the Hackle Node.js SDK. SDK Integration is a must in order to use the functions we provide.
- Step 1: Add Dependencies
- Step 2: Initialize the SDK
- Step 3: A/B test, Feature Flag
- Step 4: Send customer event
- Step 5: Termination
Step 1: Add Dependencies

npm install --save @hackler/javascript-sdkyarn add @hackler/javascript-sdk
SDK migration noticeIf you are currently using @hackler/hackle-sdk, you must migrate from your existing @hackler/hackle-sdk to @hackler/javascript-sdk.
Step 2: Initialize the SDK
Once you have imported the dependencies, in order to start using the Hackle SDK you must initialize the SDK. During this step, we get the information needed for SDK integration from the Hackle Server and store it in the SDK
HackleClient is a class that provides methods for using SDK functions.
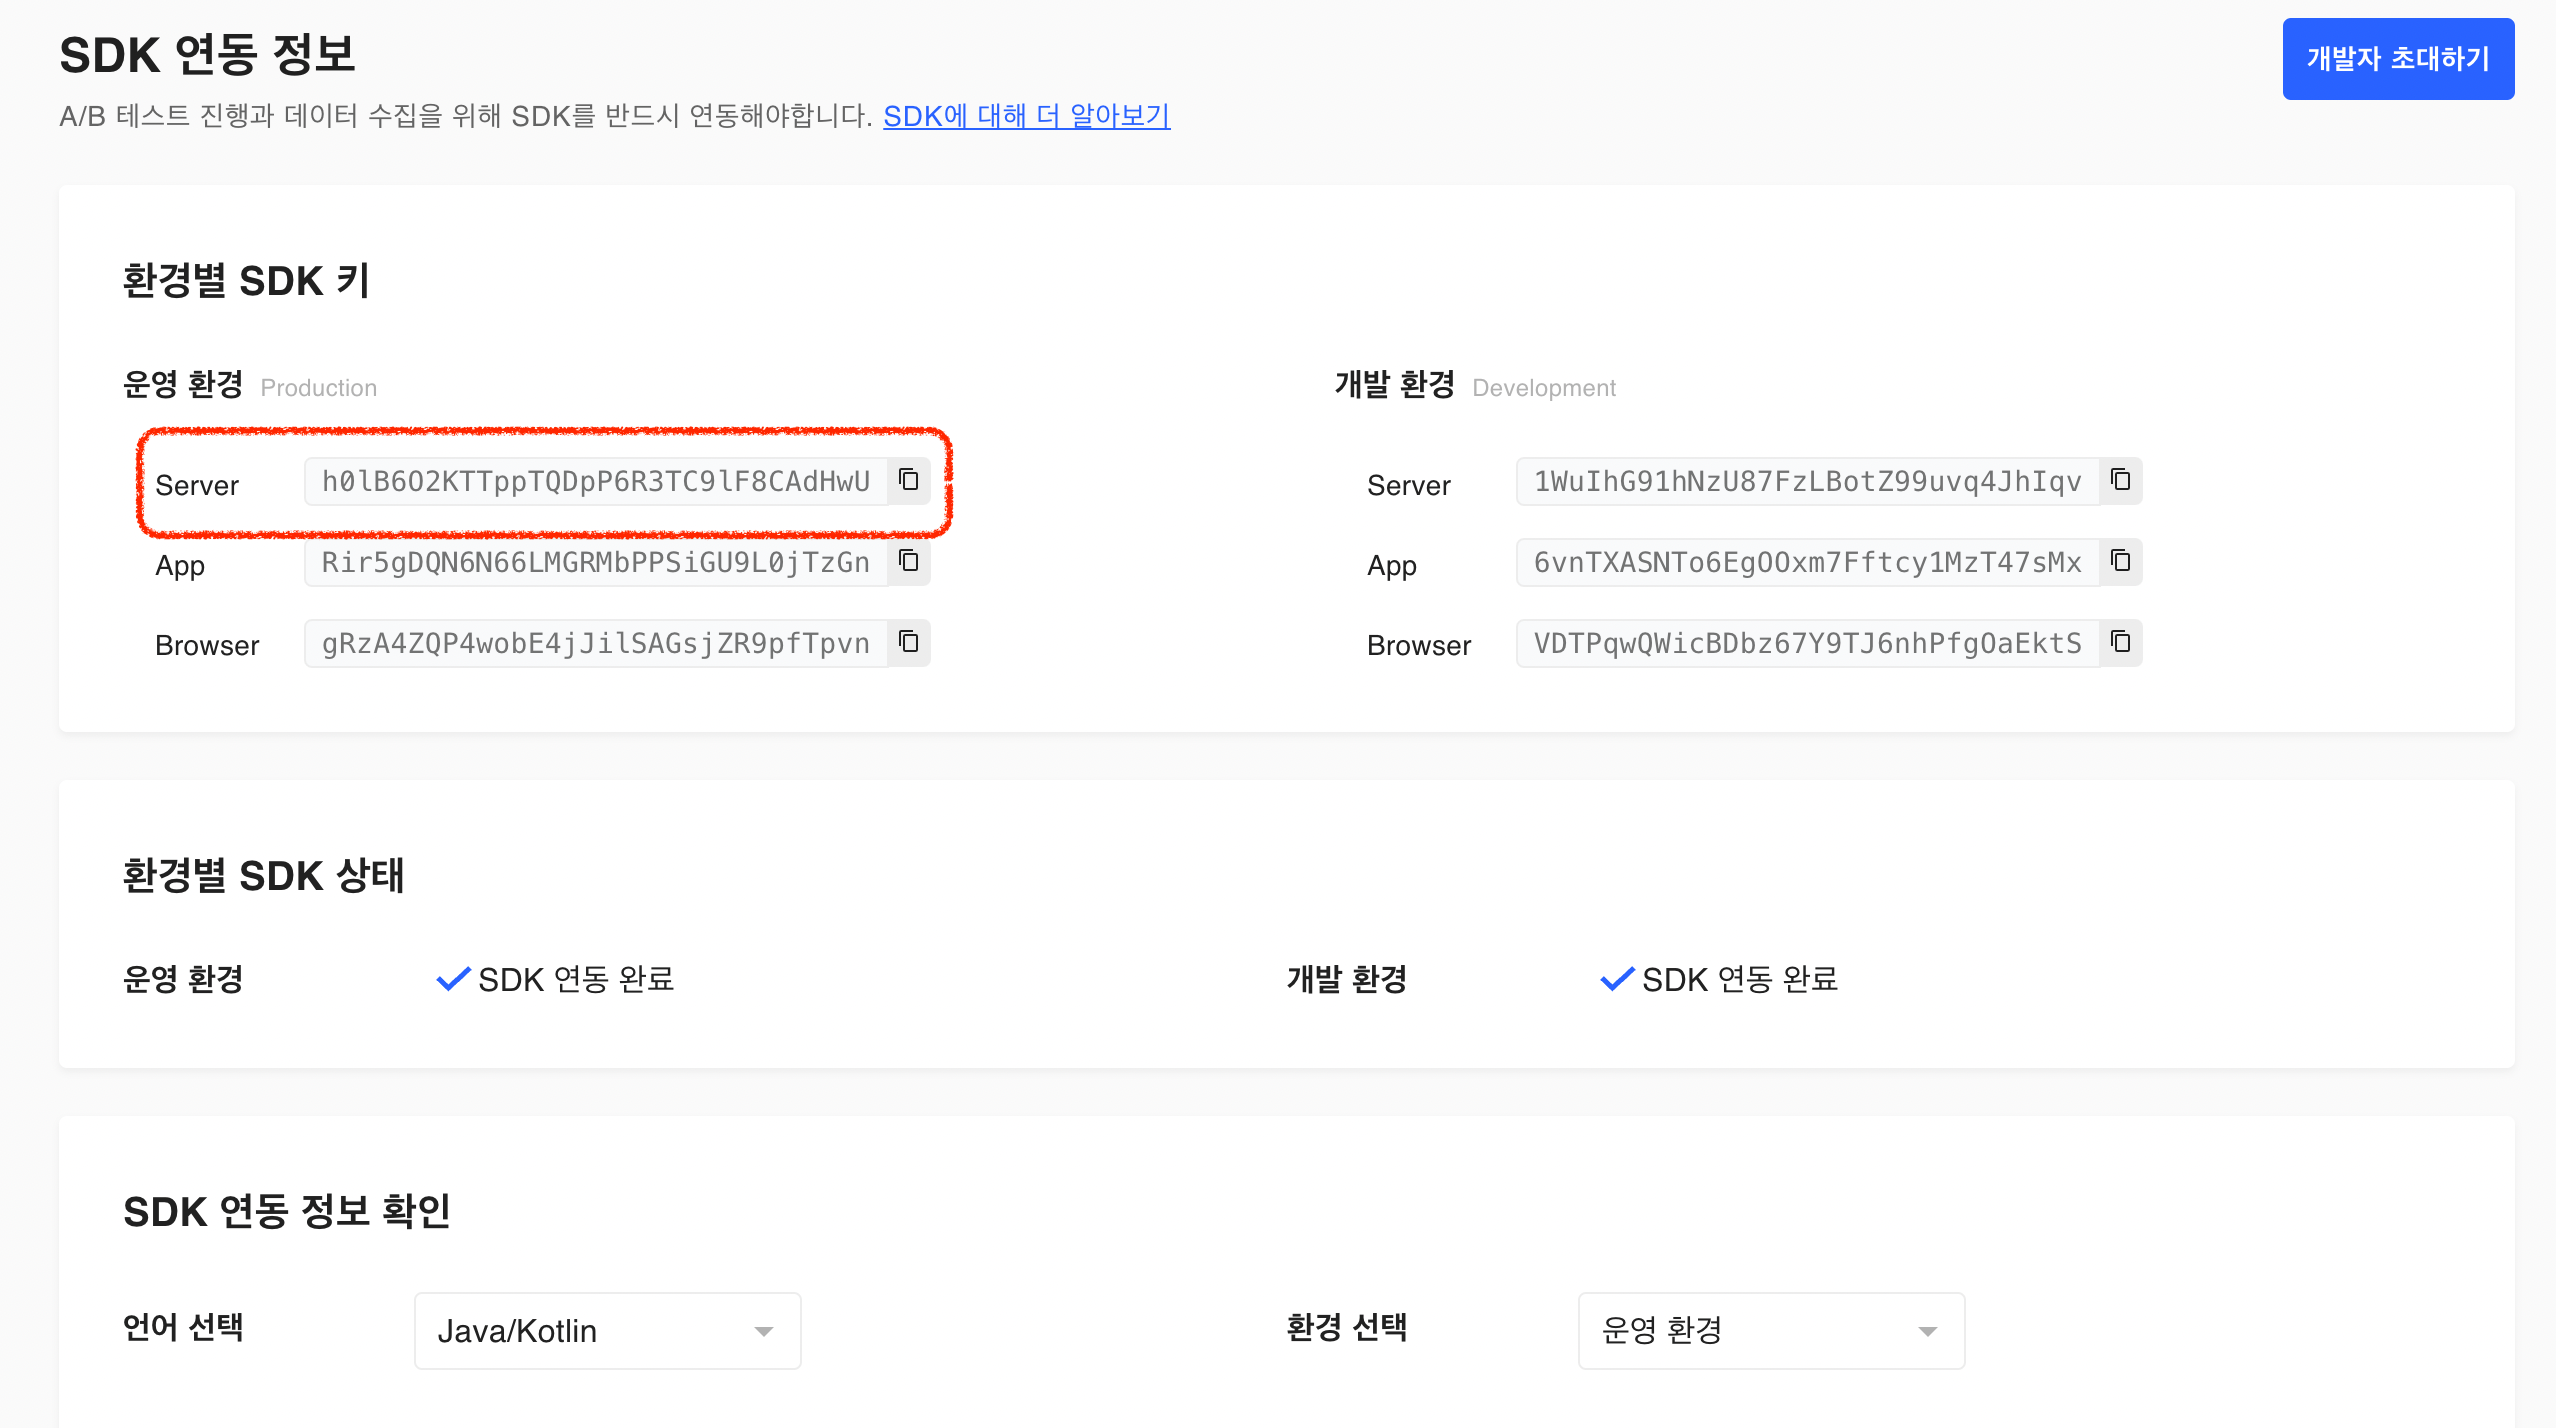
The SDK key can be found in the SDK integration in the dashboard of Hackle service.
Instantiation
const Hackle = require("@hackler/javascript-sdk");

// Enter the SDK Key in the YOUR_SERVER_SDK_KEY.
const hackleClient = Hackle.createInstance("YOUR_SERVER_SDK_KEY");
Instantiate HackleClient by passing the SDK key.
HackleClient periodically synchronizes with the hackle server as a background task to constantly obtain the necessary information.
Waiting for Sync
hackleClient.onReady(() => {
  // SDK ready to use
  http.createServer((req, res) => {

  }).listen(3000)
});Data may be lost if there are user requests before the SDK is ready
The SDK key can be found in the SDK integration in the dashboard of Hackle service. Copy and use the Server SDK Key.
Step3. A/B test, Feature Flag
A/B test
Before running an A/B test, you must distribute users to the test group and create the logic corresponding to each test group.
User distribution can then be carried out through the hackle SDK.
Test GroupThe test group refers to the existing one (control group) and improvement one (treatment group) to be tested, and there may be more than one treatment group. You can configure in the dashboard and for information on how to manage test groups, visit see the document A/B setting.
variation
Input experiment key and user identifier to the 'variation()' method to distribute users and receive results. You can implement logic by test group afterwards.
The example code below inputs the experiment key 42, There are two test groups: A and B.
// It must run after the SDK is ready. Don't forget to wrap it in onReady.
hackleClient.onReady(function() {

// Determine which test group to expose to the user in the A/B test with the test key of 42.
// Returns test group A if the test group can not be decided.
  const variation = hackleClient.variation(42);

  // Logic for Assigned Group
  if (variation === "A") {
    // Logic for Group A
  } else if (variation === "B") {
    // Logic for Group B
  }
});
Feature Flag
The Feature flag is available for SDK version 2.0.0 or later.If you are using the feature flag, please apply SDK version 2.0.0 or higher when adding dependencies.
The feature flags are in the ON state and the OFF state. Different features will be set for each state.
When a user accesses a function with a feature flag applied, the user must be able to receive an on or off state. This status determination can be made via the hackle SDK.
isFeatureOn
Input feature key to the 'isFeatureOn()' method to receive status results for the user. Implement logic based on subsequent states.
The example code below input the feature key 42 for user "ae03e1adf".
// It must run after the SDK is ready. Don't forget to wrap it in onReady.
hackleClient.onReady(function() {

// Determine which status to expose to the user in the flag with the flag key of 42.
// Returns off statep if the state can not be decided.
  const isOn = hackleClient.isFeatureOn(42);

  // logic for assigned state
  if (isOn) {
    // logic for ON
  } else {
    // logic for OFF
  }
});
Check the exposure results
On the oard Left Menu Bar] - [A/ - est] or [F or re Flag] page, page, browse to the detail page for the list of exposed A/B tests or feature flags, and click the Real-Time Exposure tab in the middle of the page to view the distribution results from integrated SDK.

Step 4. Send User Events
The Hackle SDK provides the ability to send user events to the hackle.
At each point where changes in user behavior occur, this feature provides meaningful data about user behavior and allows you to analyze user behavior from those collected data.
track
User events can be sent by passing event keys and user identifiers to the 'track()' method. If necessary, when sending user events, numeric values can be put in 'value' to be sent together.
- You can only put the number type for 'value'
Example
Suppose you have defined an event key called 'purchase' to collect events when the user presses the buy button. At this time, you may want to collect the purchase price together. In this case, you can also receive the purchase amount in 'value'.
// Send "purchase" event form user "ae2182e0"

/* Example 1: Send event key only */
if (req.method === 'POST' && req.url === '/purchase') {
  const user = { id: "ae2182e0" };
  hackleClient.onReady(function() {
    hackleClient.track({ key: "purchase" }, user)
  });

  // Existing Code
}

/* Example 2: Send event keys and numeric values together */
if (req.method === 'POST' && req.url === '/purchase') {
  const event = {
    key: "purchase",
    value: 13200
  }
  const user = { id: "ae2182e0" };
  hackleClient.onReady(function() {
    hackleClient.track(event, user)
  });

  // Existing Code
}
Example 1 only sends event keys; Example 2 shows a case of putting the purchase amount in 'value' to collect the purchase amount together.
Validate the sending of user events
Verify that user events sent by SDK are being collected successfully.
You can check the real-time event collection status by finding events sent to the SDK in the [left menu bar of dashboards] - anagement].

Step 5. Termination
process.on('SIGINT', function() {
  // kill signal
  hackleClient.close();
});
Updated 8 months ago