Sample A/B Test Practice Guide (Basic Coding Included)
We have provided a sample code of a website via Javascript for you to play around with. Integrate the sample website with Javascript SDK and run a practice A/B Test.
This article provides a hands-on guide to help you understand the nooks and crannies of Hackle’s A/B test platform.
Rather than simply creating an empty A/B test with no data results on the dashboard, you can also experience the integration process using our prescribed Hackle JavaScript SDK, and through this, you can understand the basic flow of A/B tests from start to finish.
This guide is aimed at developers, but anyone who understands the code below will be able to follow along with this exercise.
varString = "I am String";
varNumber = 3000;
Things to Prepare
- Text editor
- Web browser (Chrome, safari, etc)
- Hackle dashboard (login complete, production environment selected)
🚧 If you are using a text editor for Mac (Text Edit)If you are using Text Edit on a Mac, you need to make sure the format is in "Plain Text" before pasting your HTML code.
Please refer to the guide provided by Apple.
→Work with HTML documents in TextEdit on Mac
1. Create an A/B Test
Step 1. Create a new test
Related Documents
- [overview
- [create an a/b
Go to A/B Test on the dashboard and create a new test by clicking the Create a New A/B Test button located in the upper right corner.

All other fields can be empty other than the required field, the name of the experiment
Enter a suitable experiment name. You can leave the rest of the fields blank. Then click the Create button at the bottom right.
Step 2. Set your Metrics
Related documents
On the created A/B test screen, you can see a button called Set Metrics. Click this button to register a metric.

Metrics are needed to measure the performance of the different test groups in the A/B test and at least one must be registered.
If you press the ‘Set Metrics’ button, a dialog will appear.
You can choose a metric recommended by Hackle or create your own. In this exercise, we will select the recommended one. Choose Average purchase price among the recommended metrics.

Choose GMV per user (average value per user)
The selected metric shows the event name, metric type, and success criteria. Of these, the value of purchase under the event name is used as the event key, so please remember it. The event key is mentioned again in Step 5 and Step 8.
- You can learn more about each content in the document Step 2: Set Metrics.
Step 3. Manual assignment/ Registering test devices(optional)
This step is not required and can be skipped. However, we recommend that you include this step in your practice to allow you to understand the concept of test devices manual assignment.
Related documents
Manual assignment is a function that allows you to forcibly assign particular users with specific user identifiers or device IDs to a specific test group of the experiment.

Register test device(s)
For test group A, type abcde and press enter, for test group B type qwerty and press enter. The corresponding user identifier or device id is then registered in each group list. After that, click the Save button on the right.
Step 4. Start your experiment
Related documents
All preparations for testing in the dashboard are now complete.
Click the Start button in the upper right corner. Then the dialog below will appear.

Set the traffic allocation to 100
Because this practice guide is aimed at helping you experience A/B testing, it exposes all users to the A/B testing. Therefore, we apply a traffic weighting of 100%.
Finally, click the Start button at the bottom right of the dialog.
2. Hackle Platform Integration
Now it's time to integrate the Hackle platform using the SDK. Integrate the JavaScript SDK as already mentioned.
Related documents
Step 5. Copy-Paste Example Code
Open a text editor and create a new file named hackle_sdk_test.html and copy-paste the code below.
<!DOCTYPE html>
<html>
<head>
    <meta charset="utf-8">
    <script>
        /***************************************
          SDK key and experiment key values must be manually modified
        */
        // SDK key: replace the value within the quotation mark with your SDK key value
        HACKLE_SDK_KEY = "your-sdk-key";
        // Experiment Key: Replace the 5 on the right with your own experiment key value
        const experimentKey = 5;
        // Do not modify the  event keys
        const eventName = "purchase";

        /***************************************
          Please do not modify the content below
        */
        !function(e,t){var n,a=3e3,c=!1,l=[];function r(){}r.prototype.onReady=function(e,t){var n={block:e,timeout:t};l.push(n)},r.prototype.setUserId=function(e){n=e},e.Hackle=e.Hackle||new r,e.hackleClient=e.hackleClient||new r;var o=setInterval(function(){if(c){clearInterval(o);for(var t=0;t<l.length;t++)
e.hackleClient.onReady(l[t].block,l[t].timeout);l.length=0}(a-=50)<0&&clearInterval(o)},50),i=t.createElement("script");i.type="text/javascript",i.crossOrigin="anonymous",i.src="https://cdn.jsdelivr.net/npm/@hackler/[email protected]/lib/umd/hackle-js-client-sdk.min.js",
i.async=!0;var s=t.getElementsByTagName("script")[0];s.parentNode.insertBefore(i,s),i.onload=function(){c=!0,e.Hackle=Hackle,n&&Hackle.setUserId(n),e.hackleClient=Hackle.createInstance(HACKLE_SDK_KEY)},i.onerror=function(){clearInterval(o)}}(window,document);

        function exposure() {
            // Get the inputted User ID
            var userId = document.getElementById("uname").value;
            // Change the format for SDK transfer
            var user = { id: userId };
            // Traffic distribution
            const variation = hackleClient.variation(experimentKey, user);
            // Result Text Update
            if (variation.toString() == "A")
                document.getElementById("result").innerHTML = "The traffic distribution result of " + userId + " is <font color=\"red\">the control group (test group A)</font>.";
            else if (variation.toString() == "B")
                document.getElementById("result").innerHTML = "The traffic distribution result of " + userId + " is <font color=\"blue\">the experimental group (test group B)</font>.";
            else
                document.getElementById("result").innerHTML = "An error occurred while distributing the traffic into test groups.";
        }

        function track() {
            // Get the inputted User ID
            var userId = document.getElementById("uname").value;
            // Warning window displayed when there is no User ID inputted
            if (userId == "") {
                alert("Please enter your USER ID.")
                return
            }
            // Change to a format suitable for SDK transfer
            var user = { id: userId };
            // Send user events
            hackleClient.track(eventName, user);
            alert("User event sent.")
        }
    </script>
</head>
<body>
<h1>Example of Hackle JavaScript SDK integration</h1>
<h2>Example of traffic distribution</h2>
<div>
    <label for="uname">Enter USER ID: Distribute the traffic into different test groups with the entered USER ID and display the results.</label><br>
    <input type="text" id="uname" name="uname"><br>
    <input type="button" value="Traffic distribution" onClick="exposure()">
    <p id="result">Traffic distribution results will be shown after distribution occurs.</p>
</div>

<h2>Example of sending user events</h2>
<div>
    <label for="fname">When the  button below is clicked, the track() function is called which sends a user event together with the USER ID entered above.</label><br>
    <input type="button" value="Send user event" onClick="track()">
</div>
</body>
</html>
If you look at the 7th line of the code above, it says SDK key and experimental key values must be manually modified. Modifying this value will proceed in the next step, Step 6.
Underneath it is written that eventName should not be modified. The ‘purchase’ assigned to this variable is the event key of the metric set in Step 2.
Step 6. Modify SDK key and experiment key
The SDK key can be found in the SDK Integration Information menu.
Referring to the following screenshot, copy the Browser key of the operating environment.

Click the icon to copy the key.
The experiment key can be found on the A/B test detail page of the experiment you created earlier.

For the screenshot above, the experiment key is 23.
The number in the experiment key {number} part to the left of the experiment name is the experiment key.
In the case above, the experiment key is '23'. However, keep in mind that the code should contain the experimental key from the A/B test you created, not 23.
For example, if your SDK key is abcdefg and your experiment key is 23, your code should be modified as follows:
/***************************************
SDK key and experiment key values must be manually modified
*/
// SDK key: replace the value within the quotation mark with your SDK key value
HACKLE_SDK_KEY = "abcdefg";
// Experiment Key: Replace the 5 on the right with your own experiment key value
const experimentKey = 23;
Please be careful not to delete the quotation marks when replacing the SDK key.
After editing the SDK key and experiment key and saving the file, the SDK integration is complete.
3. Carrying our your sample A/B test
Related documents
Step 7. Traffic distribution practice
If you open the previously edited hackle_sdk_test.html file on a web browser, you will see the following screen.

When the hackle_sdk_test.html file is opened on a browser
Follow the steps as shown on the screen.
First, enter your USER ID. Type abcde. Then press the Traffic distribution button.
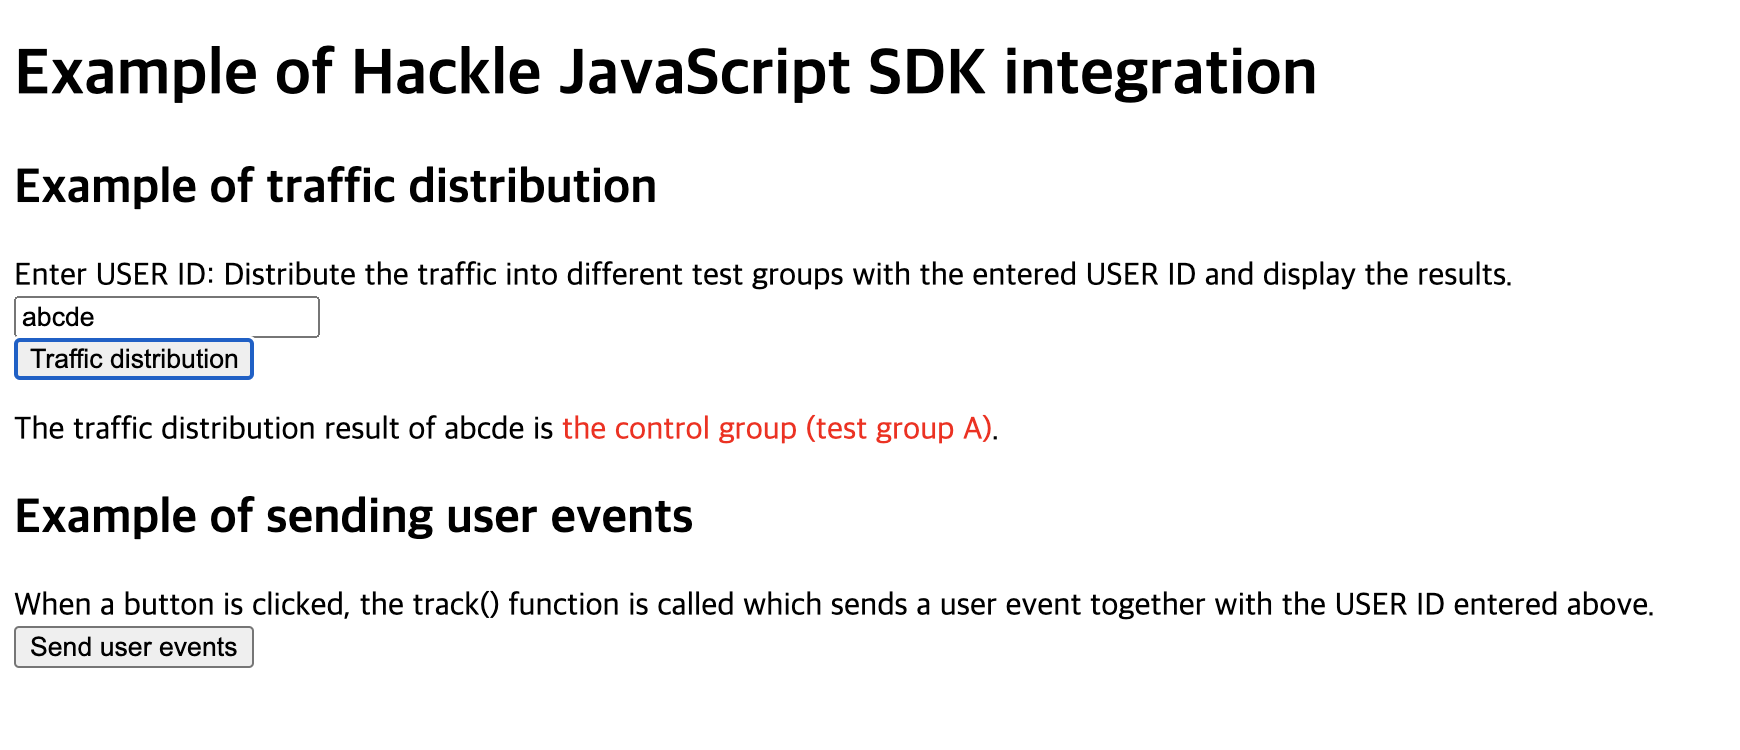
If the Step 3. Manual assignment was set earlier, the user will be forcibly assigned to test group A and the result is as shown in the screenshot above. If you haven't set up manual assignment, the user may also be assigned to test group B.
Now, type qwerty and press the Traffic distribution button.
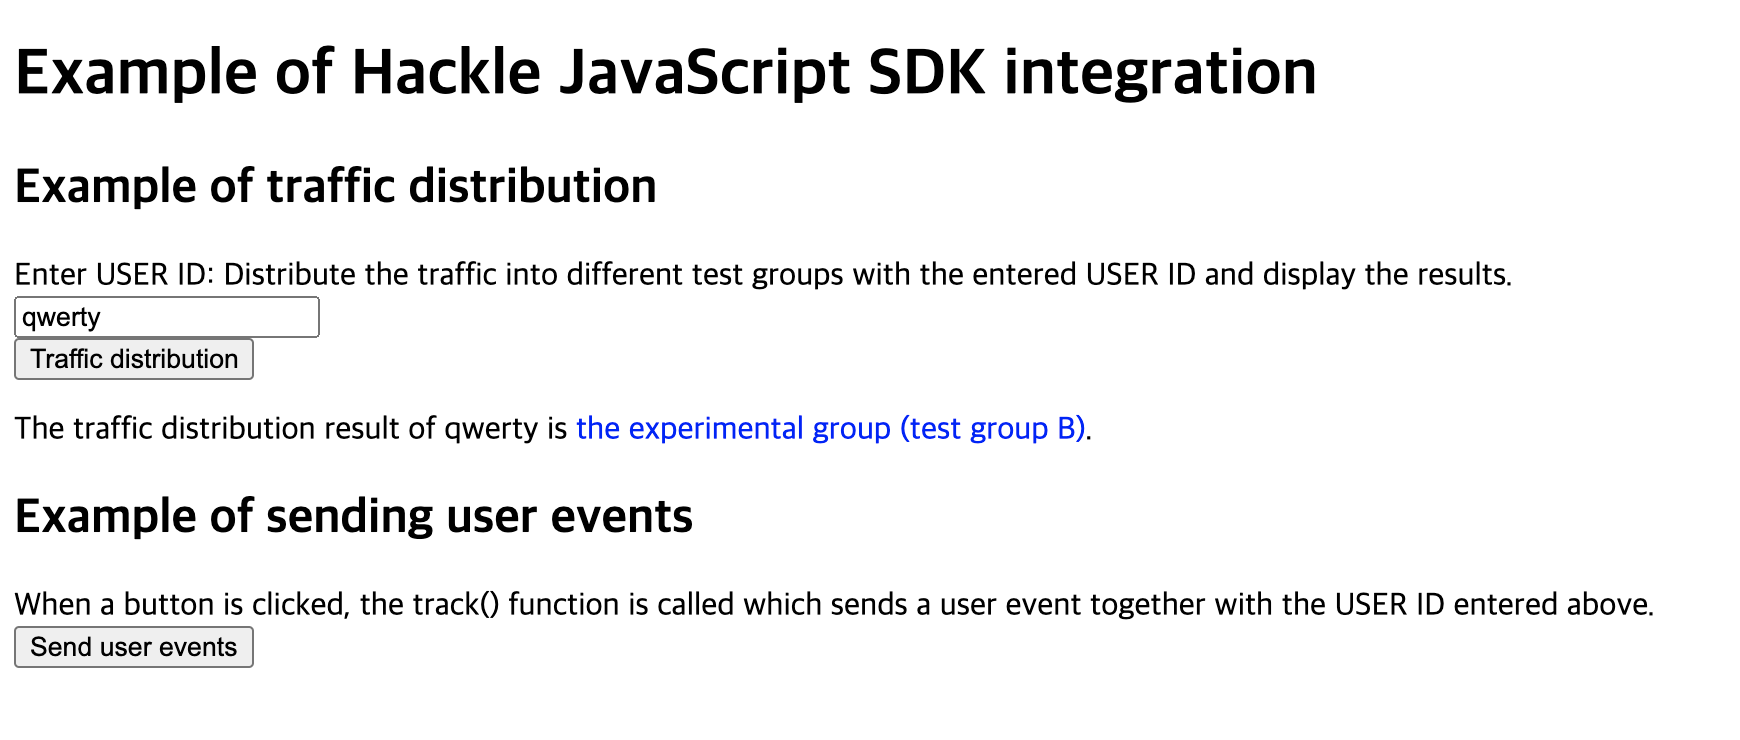
Contrary to the example of abcde, if the setting was made in the Step 3. Manual assignment step, the user is forcibly assigned to test group B and the result is as shown in the screenshot above. If you haven't set up manual assignment, the user may also be assigned to test group A.
I set the manual assignment, but the result is different from the screenshot. What did I do wrong?
- Check that you have clicked Start Test on the dashboard and set the percentage of traffic to 100%. (Step 4)
- Check if the user ID entered in the manual assignment menu is the same as the user ID entered in the html page. (Step 3)
- Check that you have entered the SDK key correctly. (Step 6)
- Check that you entered the experiment key correctly. (Step 6)
In addition to that, you can also enter your own random user ID in the test device menu of the dashboard and check to see if the user was allocated correctly to the assigned test group.
All the traffic distribution results will be reflected in the dashboard.
If you click the A/B test corresponding to the experiment key currently being tested on the dashboard, you will be directed to the screen below.

Click on the Live tab
Here you can click on the Live tab to see the exposure results of the traffic distributions performed in the last 30 minutes. The result is updated every 30 seconds.

Live exposures
What step 7 suggestsThose assigned to test group A will see red text on the results screen, and those assigned to test group B will see blue text on their screen.
By distributing users through A/B testing like this, you can experience different UI/UX or different logic depending on which group a specific user belongs to.
To look at the specific coding mechanism of the
hackle_sdk_test.htmlfile, please review the implementation offunction exposure() { ... }on the JavaScript u already closed the ` document.

Step 8. Practice sending user events
Now that we have a good understanding of traffic distribution, let's practice sending user events. You can think of sending user events as sending information to Hackle that a specific event has occurred.
If you already closed the hackle_sdk_test.html file, try opening it again.

Step 3 has been included.
Enter a random user ID again and click Traffic distribution to check the distribution result, and then click the last button that you have not clicked on before, Send user events.
After repeating this a few times with numerous random user IDs, enter the detail page of Events on the Hackle dashboard.
 copy.png")
Press on purchase
Click on the ‘purchase’ event in the event list. This is the event key of your metric set in Step 2.

You can view all the event transmissions that have occurred in the last 30 minutes.
You can view a real-time record of the events that occurred in the last 30 minutes. Similar to the live exposure graph, this is also updated every 30 seconds.
Since this graph shows the results for a specific event, if you only press on traffic distribution but not on send user event, nothing will appear on the graph.
What step 8 suggestsTo collect data on a particular user action, you need to define an event for that action and send the event key back to Hackle whenever that action occurs.
To check whether the transmission and collection of information are functioning properly, you can check through the detailed screen of the corresponding event key from the event list on the dashboard.If you want to look at the specific coding mechanism of the
hackle_sdk_test.htmlfile, please review the implementation offunction track() { ... }on the JavaScript iled information, you can re document.
4. It's Your Turn!
If you have completed all the steps leading up until now, it is safe to say that you have fully experienced how to work Hackle's A/B testing using the JavaScript SDK.
Now, it's time to create your own A/B test.
For more detailed information, you can refer to all the Related documents section presented in each step.
Updated 20 days ago