Create an In-App Message Campaign
To use in-app messages, you must use the following or above SDK versionWeb : javascript 11.29.0, react 11.29.0
App : Android 2.35.0, iOS 2.30.0, React Native 3.8.0, Flutter 2.5.0
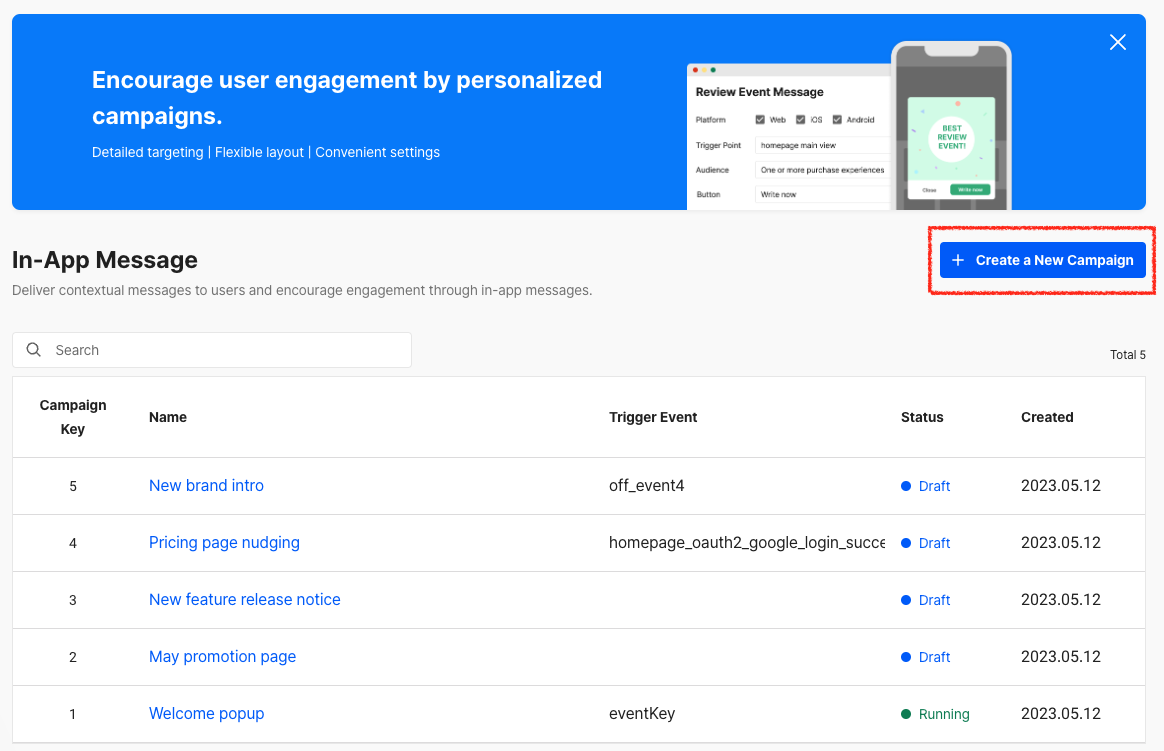
You can create a new in-app message campaign by clicking the "+ Create Campaign" button located in the upper right corner of the "In-app Messages" menu in the dashboard.
Create a new campaign
Step 1. Campaign info
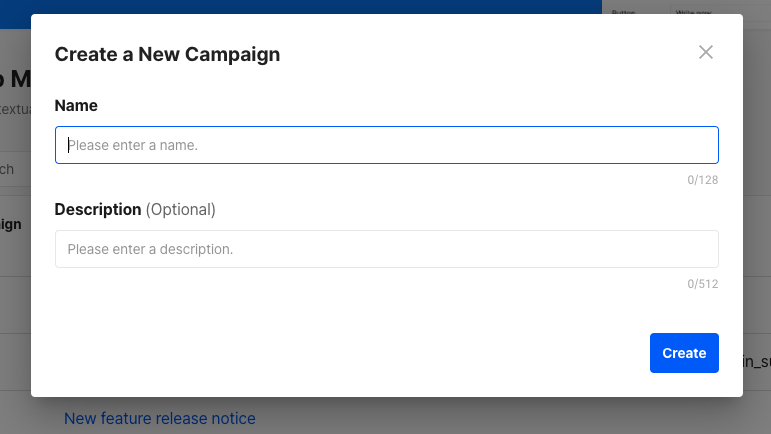
Campaign info
- Name (Must): Name of the campaign
- Description (Optional): Having descriptions can be very helpful for team members to understand what campaigns are being conducted by others.
Step 2. Status
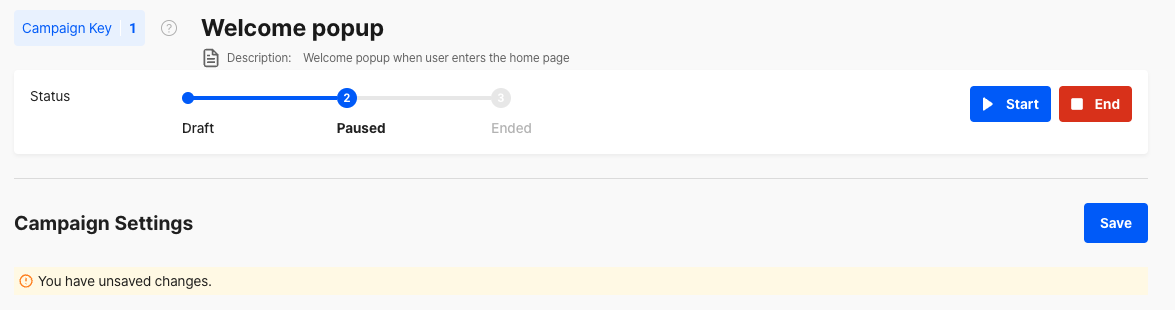
After creating a campaign, you can view the campaign key, title, description, and status.
- Campaign Key: It is a unique value that distinguishes the campaign and can be used to extract users exposed to a specific campaign.
- Campaign Title / Description: You can modify the title and description of the campaign.
- Campaign Status: When you first create a campaign, its status is "Draft." After setting up the campaign content, you can start the campaign. If you want to modify an ongoing campaign, you need to change its status to "Paused". You can also end a campaign if you no longer want to continue it.

Campaign status
Step 3-1. Campaign Settings > Type
You can choose the platform environment and layout for message delivery.

Platform, Layout Setting
- Supported platform
- Web : PC Web, Mobile Web
- App : Android, iOS
- Layout
- Orientation : Portrait, Landscape
- Modal Popup:
- Image + Button
- Image + Text + Button
- Image
- Banner
- Text
- Image + Text
- Image
- Bottom Sheet
- Image + Button
- Image
- Full-screen Popup (coming soon)
- Carousel (coming soon)
Step 3-2. Campaign Settings > Message
- You can freely configure the message contents. The configured content will be automatically displayed in the preview area on the right side of the screen.
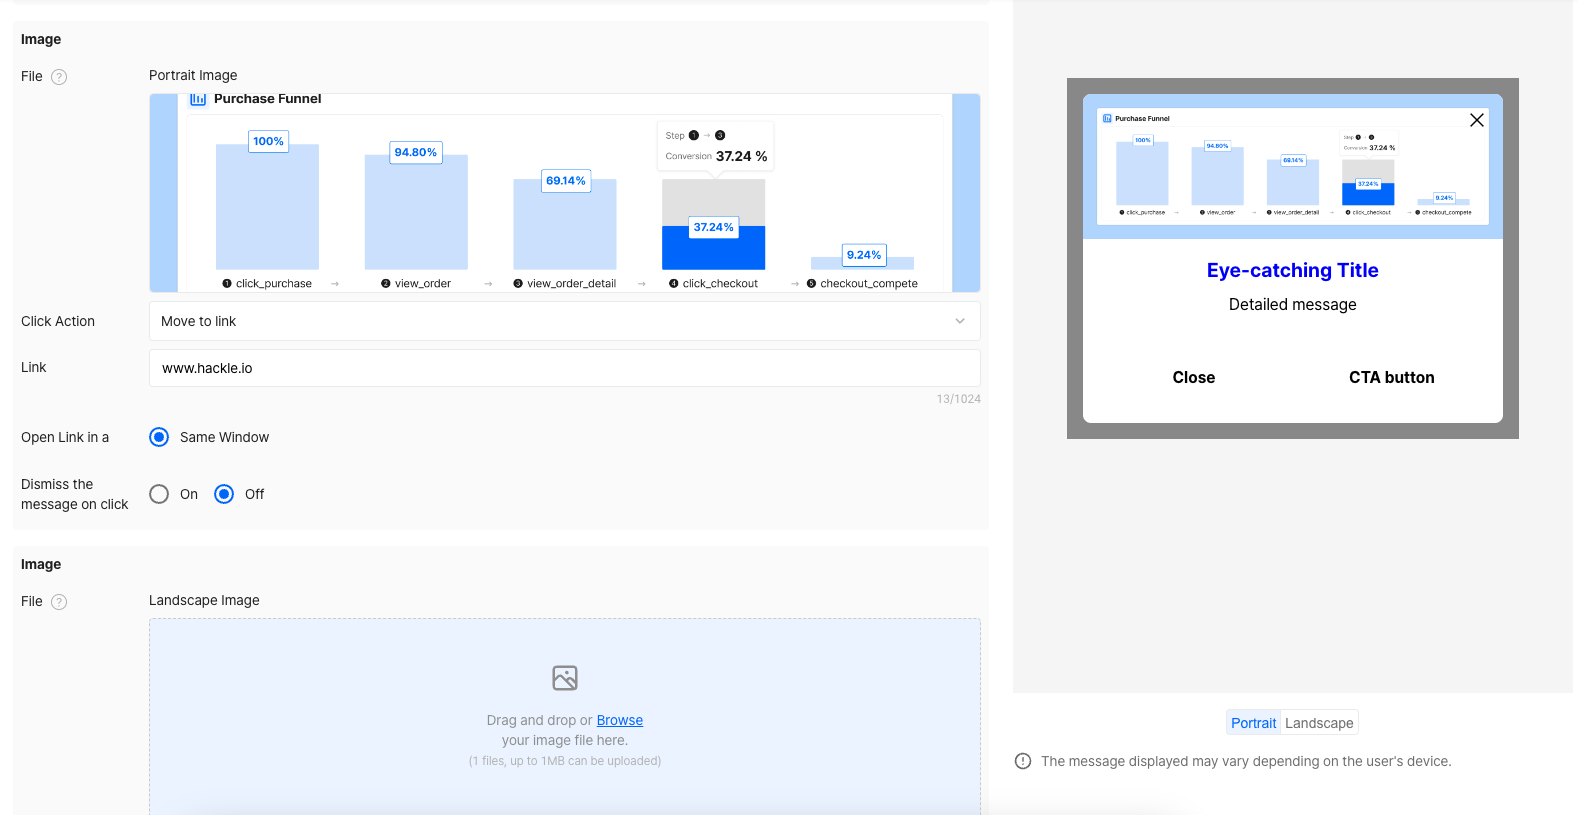
Image configuration
- Image:
- Recommended aspect ratio and size for each layout
Layout | Recommended size |
|---|---|
age Image | - Portrait : 2:3 / 1200px:1800px |
age + B Image + Button | - Portrait : 2:3 / 1200px:1800px - Landscape : 3:2 / 1800px:1200px |
age + T Image + Text + Button | - Portrait : 29:10 / 1450px:500px - Landscape : 29:10 / 1450px:500px |
mage + T Image + Text | - Ratio : 1:1 / 150px:150px |
mage Image | - Ratio : 24:7 / 288px:84px |
eet] Image Image | - Portrait : 3:2 / 1800px:1200px |
eet] Image + B Image + Button | - Portrait : 3:2 / 1800px:1200px |
- File format: PNG, JPG, JPEG
- File size: Maximum 1MB
- Click action
- None
- Move to link
- Open Link in a (supported for Web only) : Same Window, New Window, New Tap
- Dismiss the message on click : On, Off
- Popup Style : Color for background, X button
- Text:
- Title: Maximum 30 characters
- Body: Maximum 70 characters
- Color : Color for title text, Body text
- Buttons:
- Maximum 2 buttons
- Color : Color for button Background, Border, Text
- Click action :
- Close
- Do not show again for a day
- Move to link
- Open Link in a (supported for Web only) : Same Window, New Window, New Tap
- Dismiss the message on click : On, Off
Bottom Sheet Animation
The bottom sheet layout supports animations on mobile and tablet devices.
<Bottom sheet - Mobile animation>
<Bottom sheet - Tablet animation>
- You should save the changes by clicking the "Save" button at the top of the screen.
Save the campaign settings
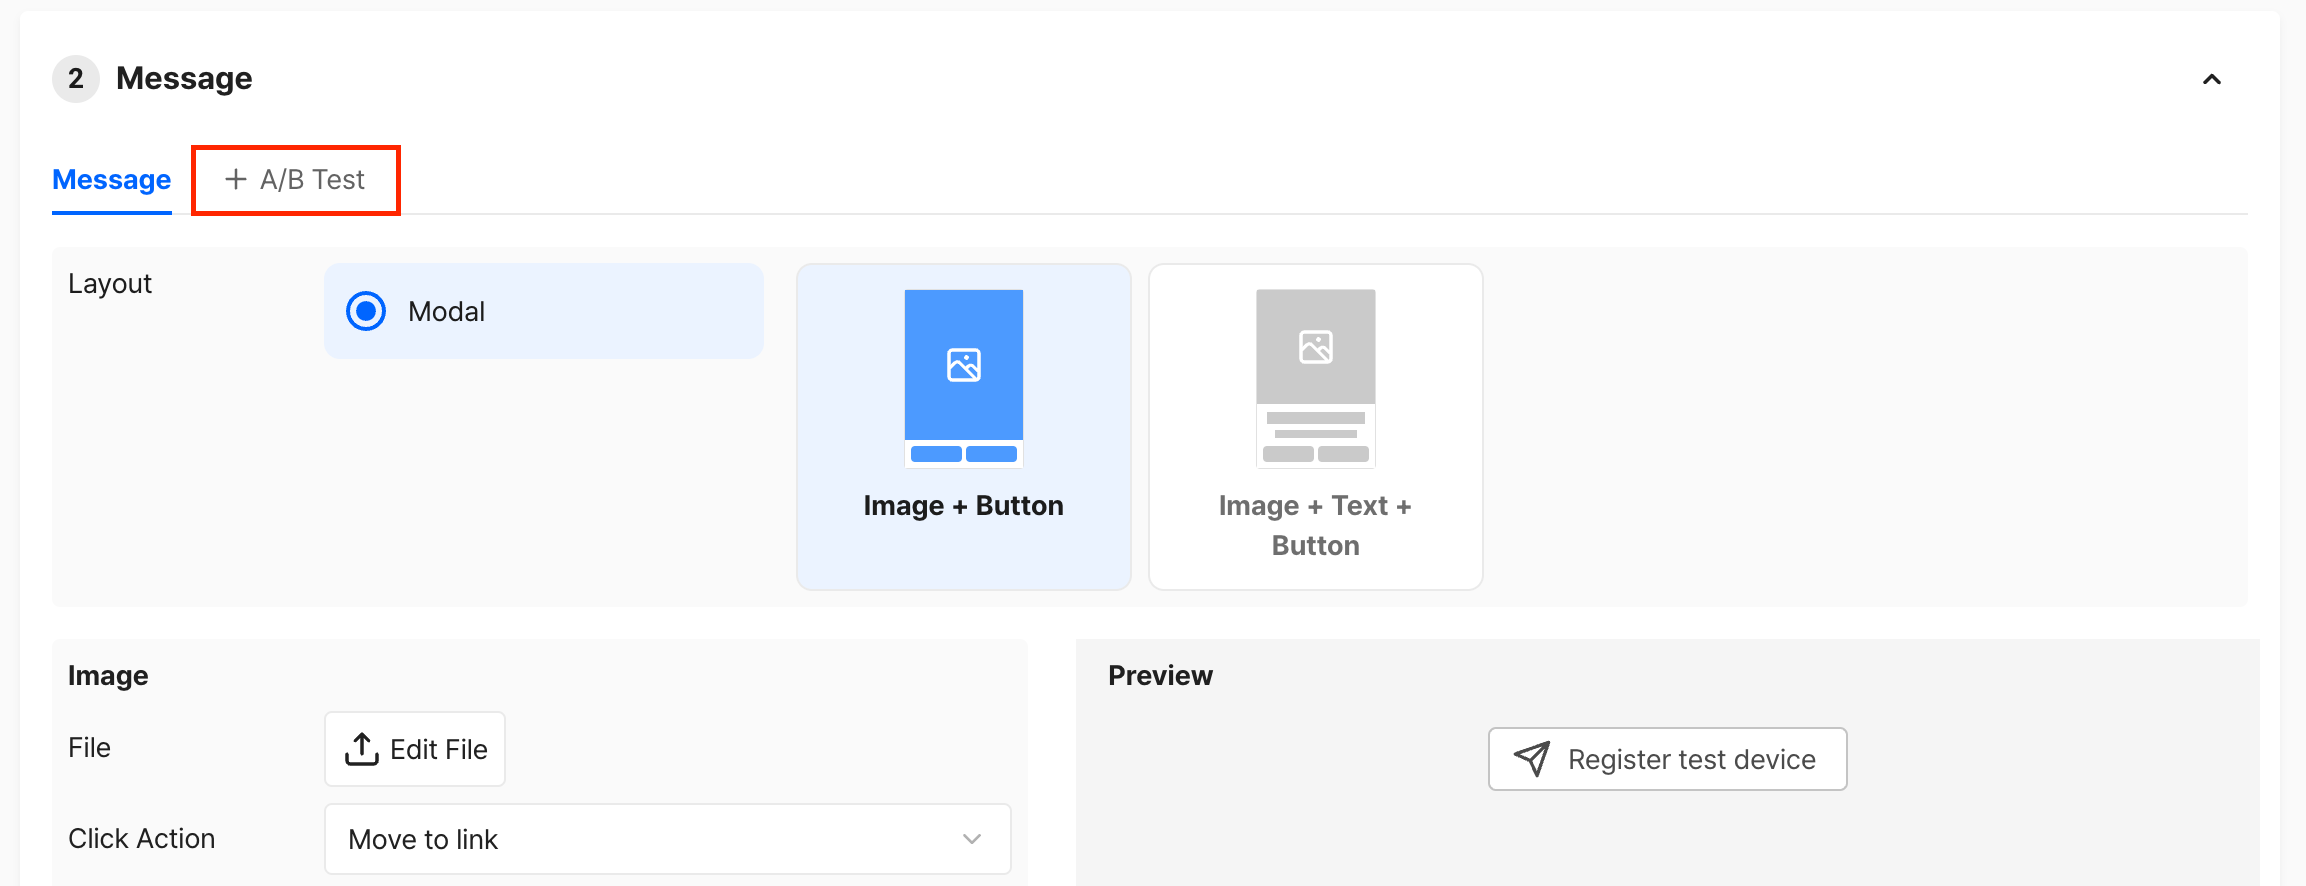
Step 3-3. Campaign Experiment > Setting
You can choose the best one through A/B Test with various messages.
- Create A/B Test
-
By clicking the on to creat button to create the various messages for A/B Test.
-
You can add more Group and remove the group as below image.
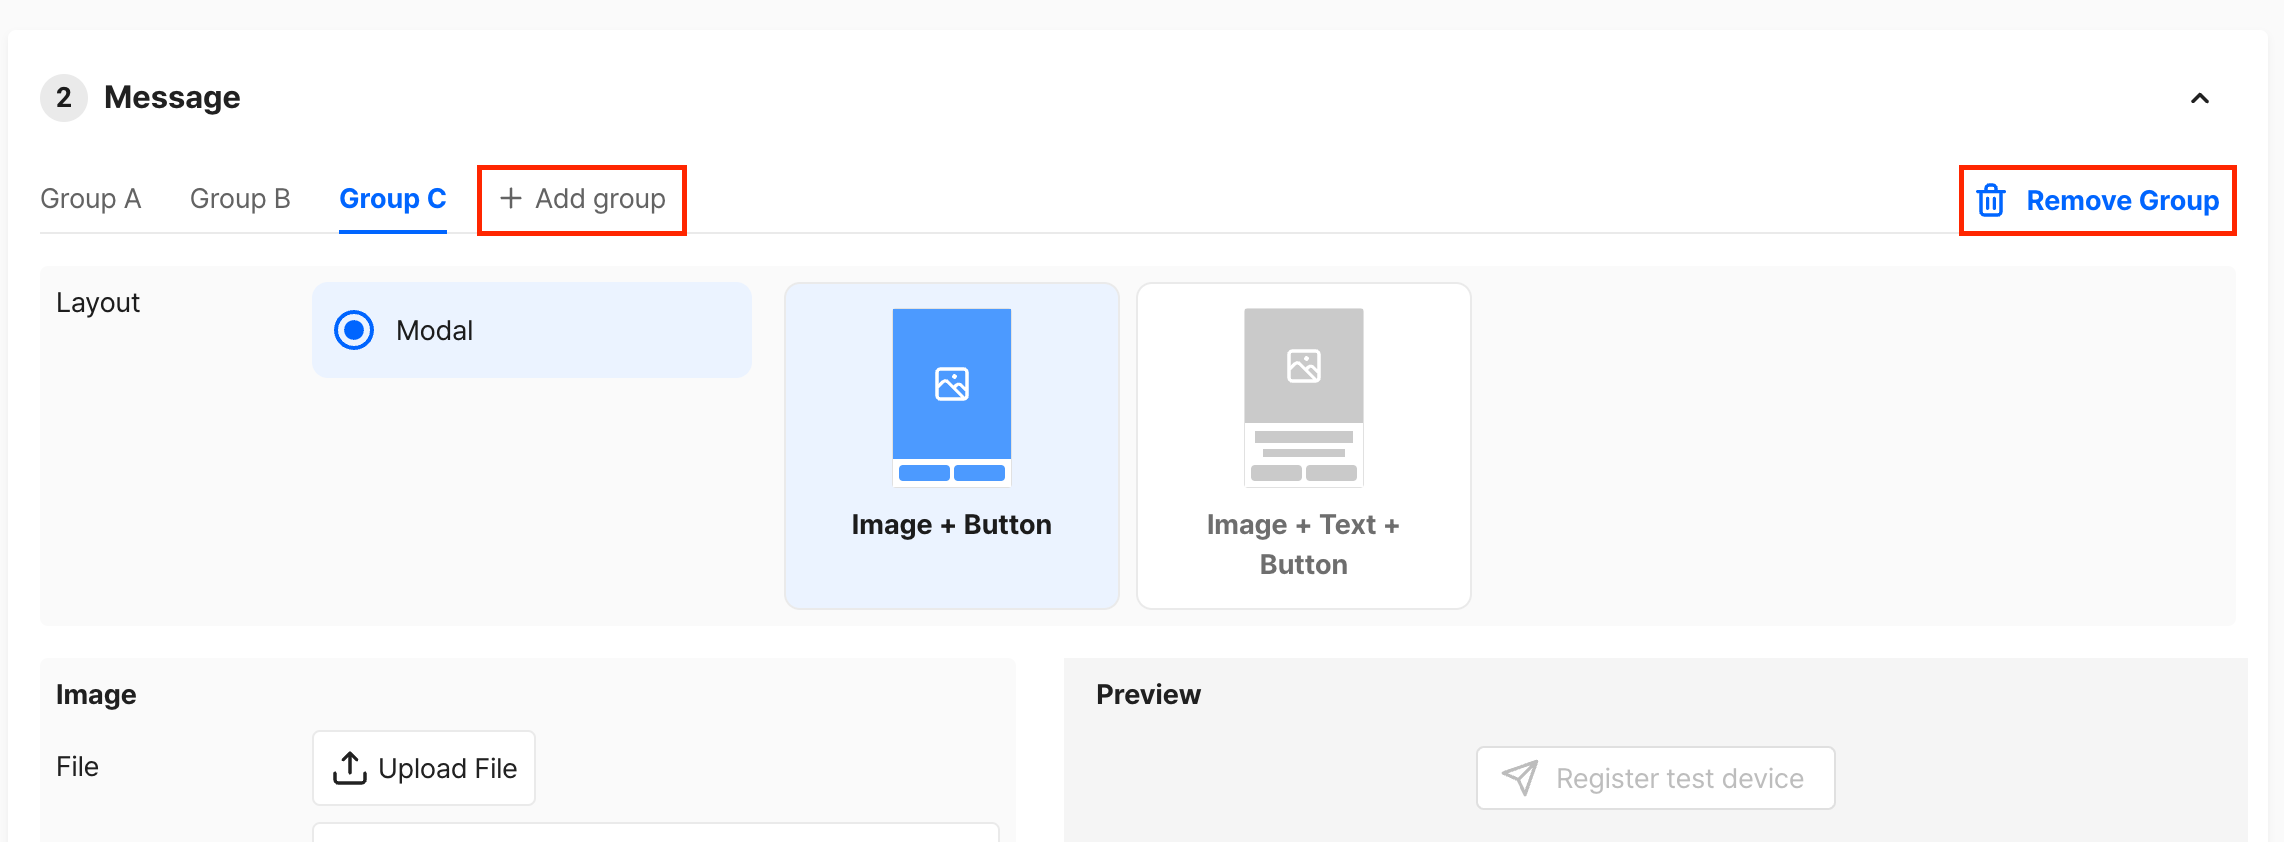
-
About Measure
- Traffic distribution is called MAB.
The experiment measures the performance of each message based on the 'click rate', maintains traffic distribution every 1/24/48 hours after the message is exposed, and adjusts traffic distribution based on the performance of each message - CTR(Click-through rate) only calculates the click-through rate of links entered in the in-app message settings. (Close button is not included in the click-through rate.)
- Traffic distribution is called MAB.
Step 4. Trigger
You can configure when the message will be displayed based on specific events. If you're wondering how to add events, you can refer to Create a New Event for more information.
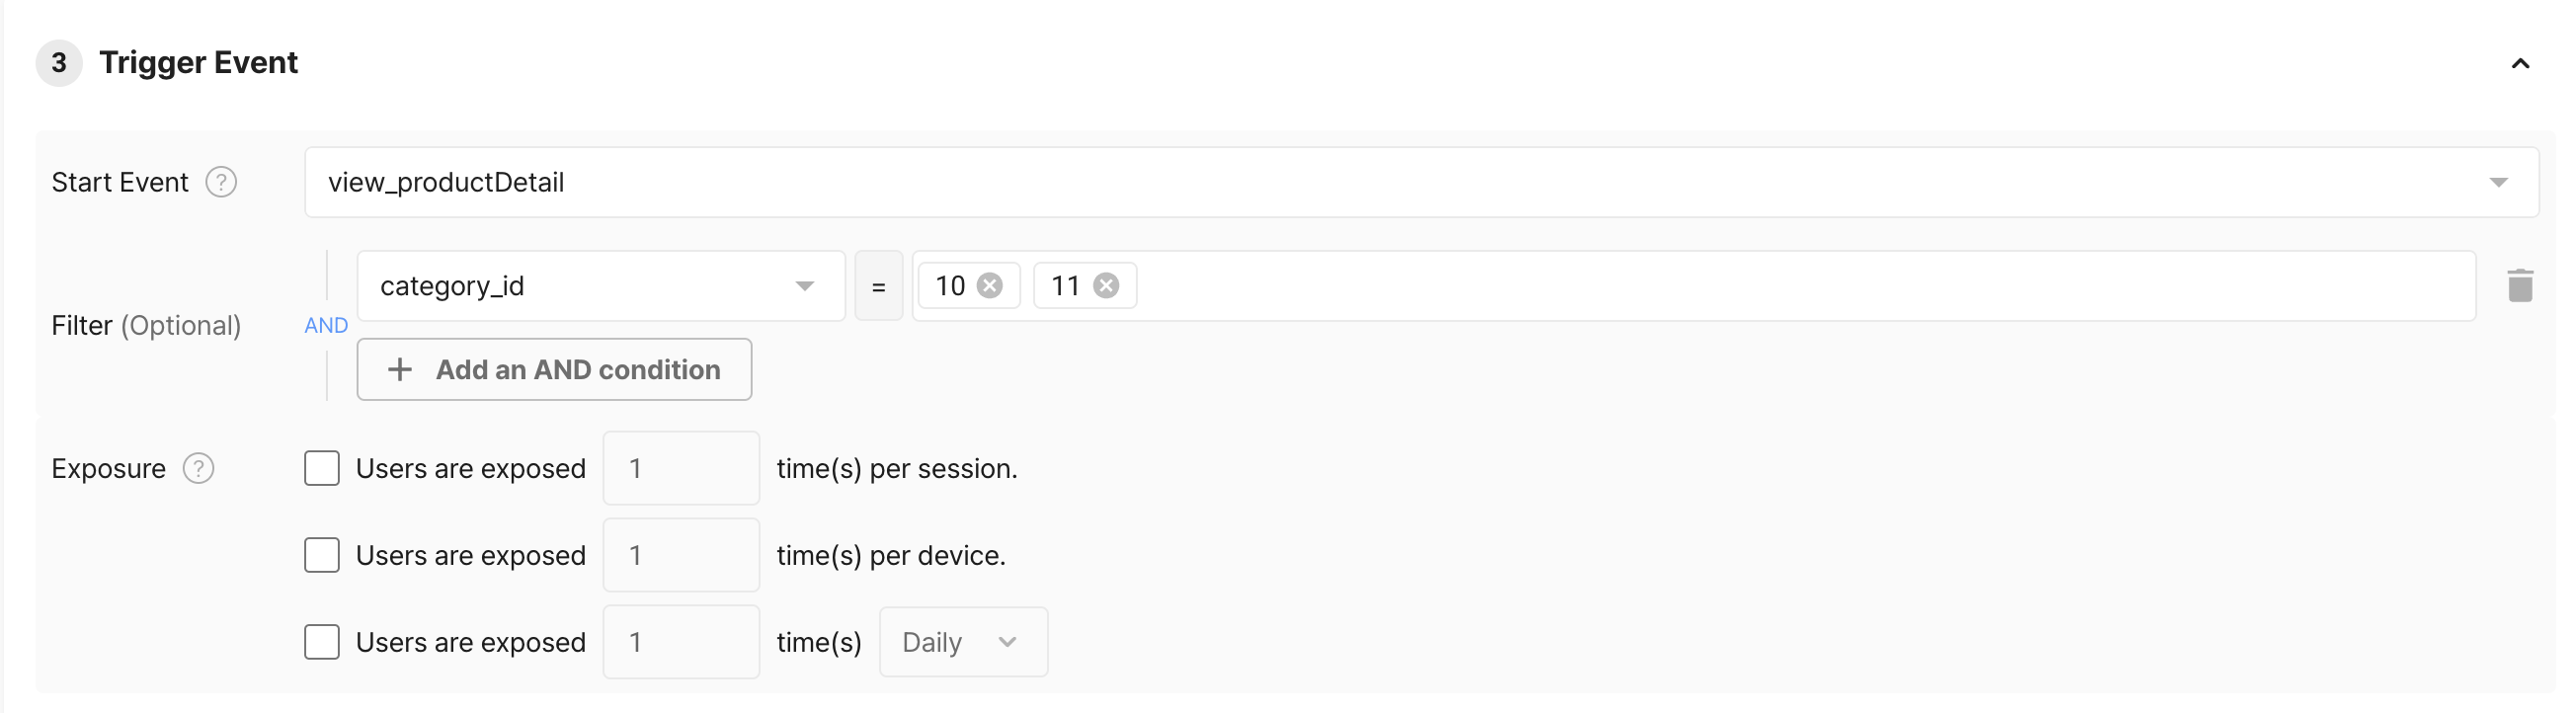
Trigger event
- Start Event
- You can configure when the message will be displayed based on specific events. If you're wondering how to add events, you can refer to Create a New Event for more information.
- Filters (Optional)
- You can set more detailed conditions through event properties. In the example image, the view_productDetail event's category_id property is used to set the condition of displaying the message when visiting a specific category's product page.
- Exposure Frequency
- You can set the frequency of displaying the message to prevent customer fatigue. If multiple conditions are set, they will be applied with an AND condition.
- How many times to display within one session of the same user.
- How many times to display to the same user's device (regardless of the period).
- How many times to display to the same user daily/hourly.
- You can set the frequency of displaying the message to prevent customer fatigue. If multiple conditions are set, they will be applied with an AND condition.
Step 5. Period
You can configure whether to keep the message displayed continuously or for a specific duration.

Scheduling
- If you select "Display permanently", the message will be immediately displayed when you click "Start", and it will continue to be displayed unless explicitly "End" is triggered.
- If you set a customized schedule, the message will only be displayed during the configured period.
Step 6. Run the campaign
You can also target specific users instead of stead of all users. Utilize various properties to define your desired customer segments!
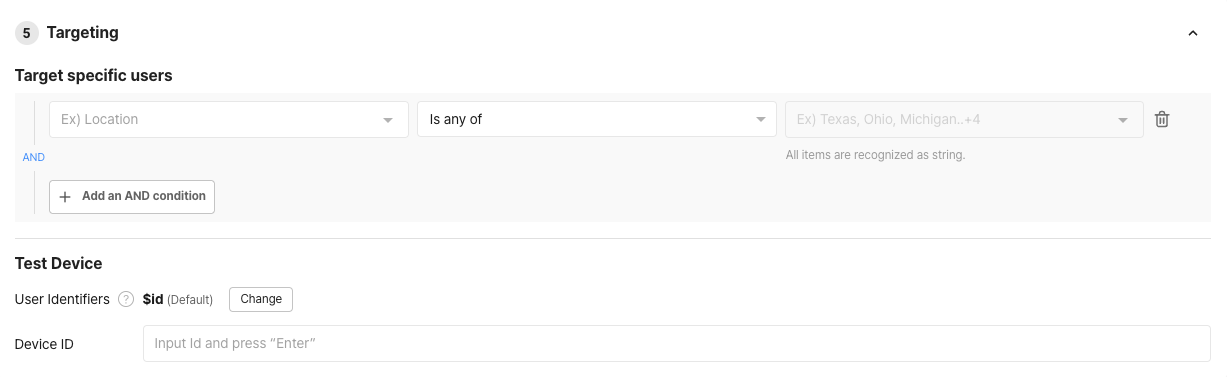
Targeting
If you want to test the message on internal user devices before exposing it to actual customers, you can input the desired user identifier into the test devices.
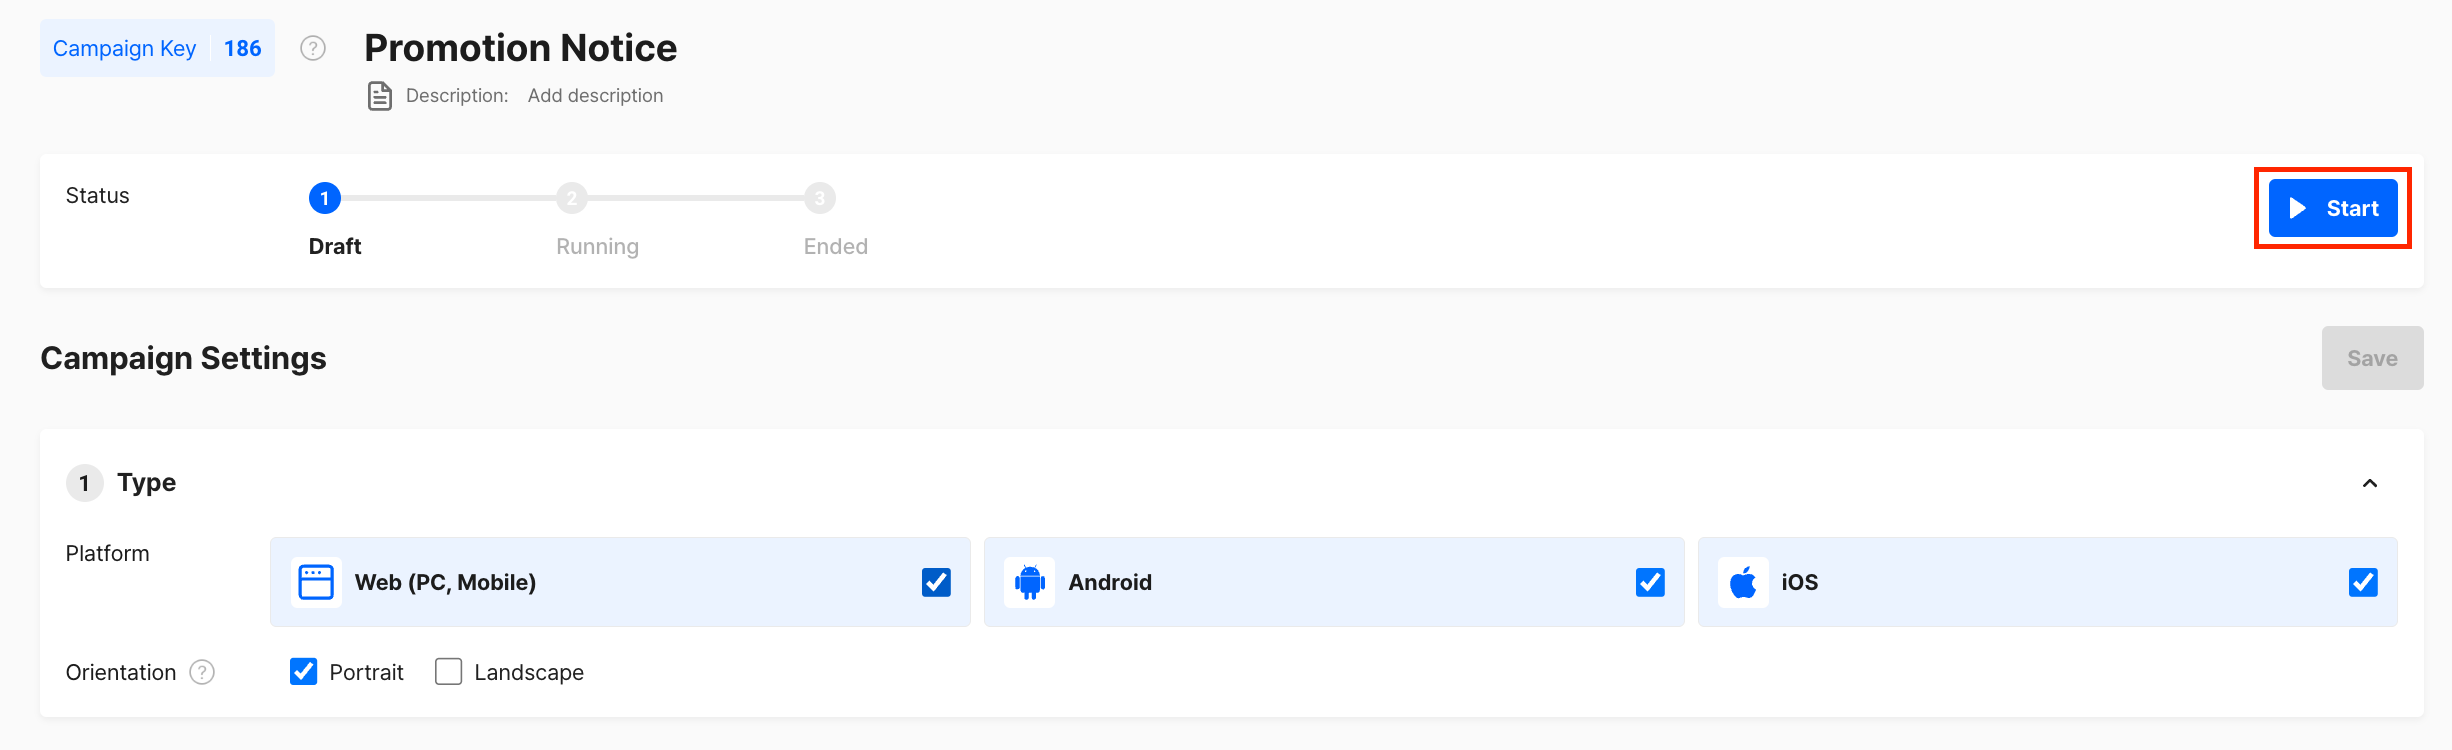
Step 7. Run the campaign
Once you have completed all the fields, click the "Start" button at the top to launch the campaign.
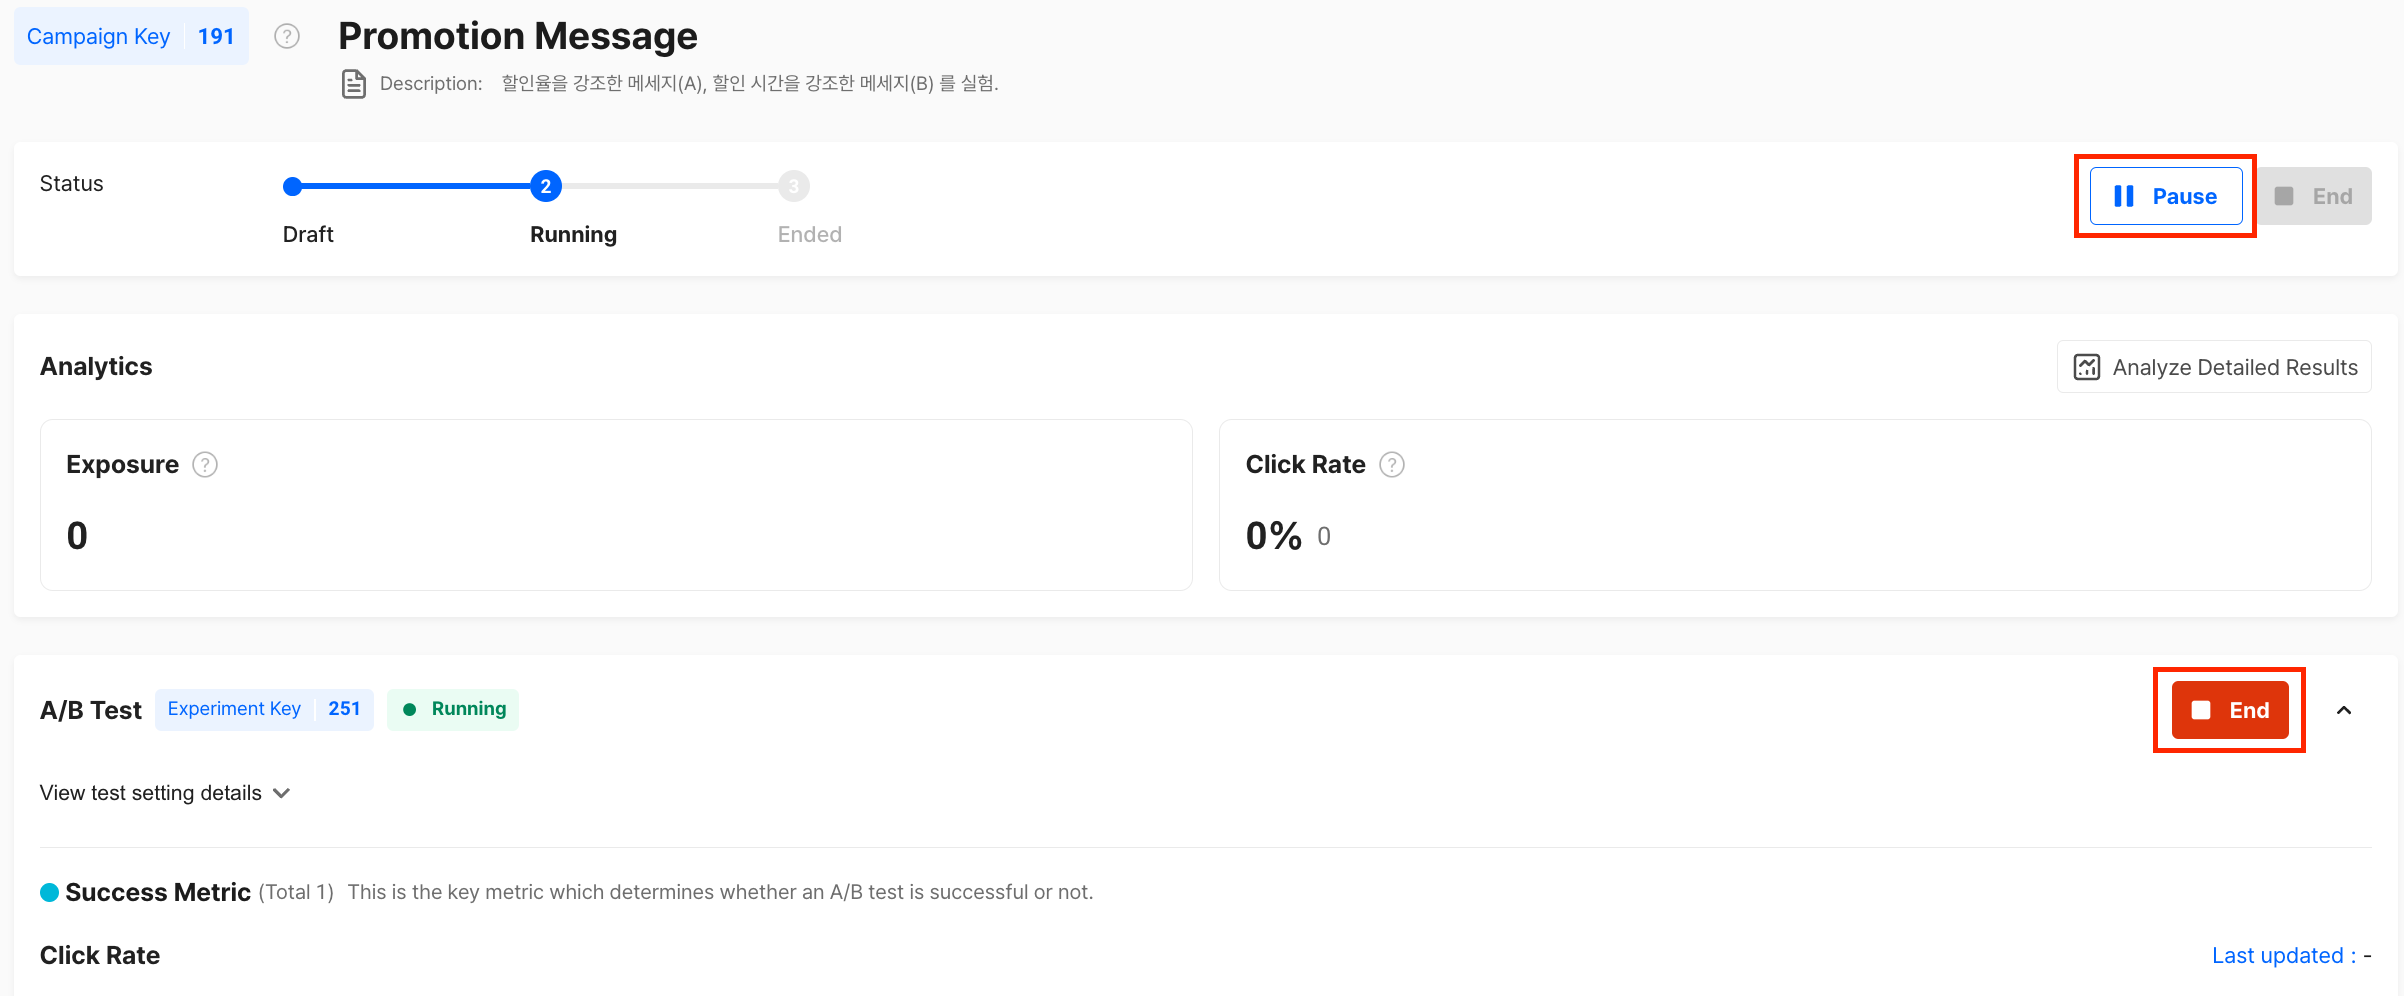
Ongoing campaigns can be paused or terminated.

Activate the campaign
Step 7-1. Campaign with A/B Test
- Start with A/B Test : Once you have set up an experiment, you can also start the experiment by pressing the
he same
button in the same way.
Start
- Implement the A/B Test
- Once the experiment set up, you can see the number of exposures and conversions, conversion rates, and the best probability of each group. ("Conversion" means click)
- Referring to below image, you can see more information such as conversion rate trends, traffic distributions, and cumulative distribution status for each group.
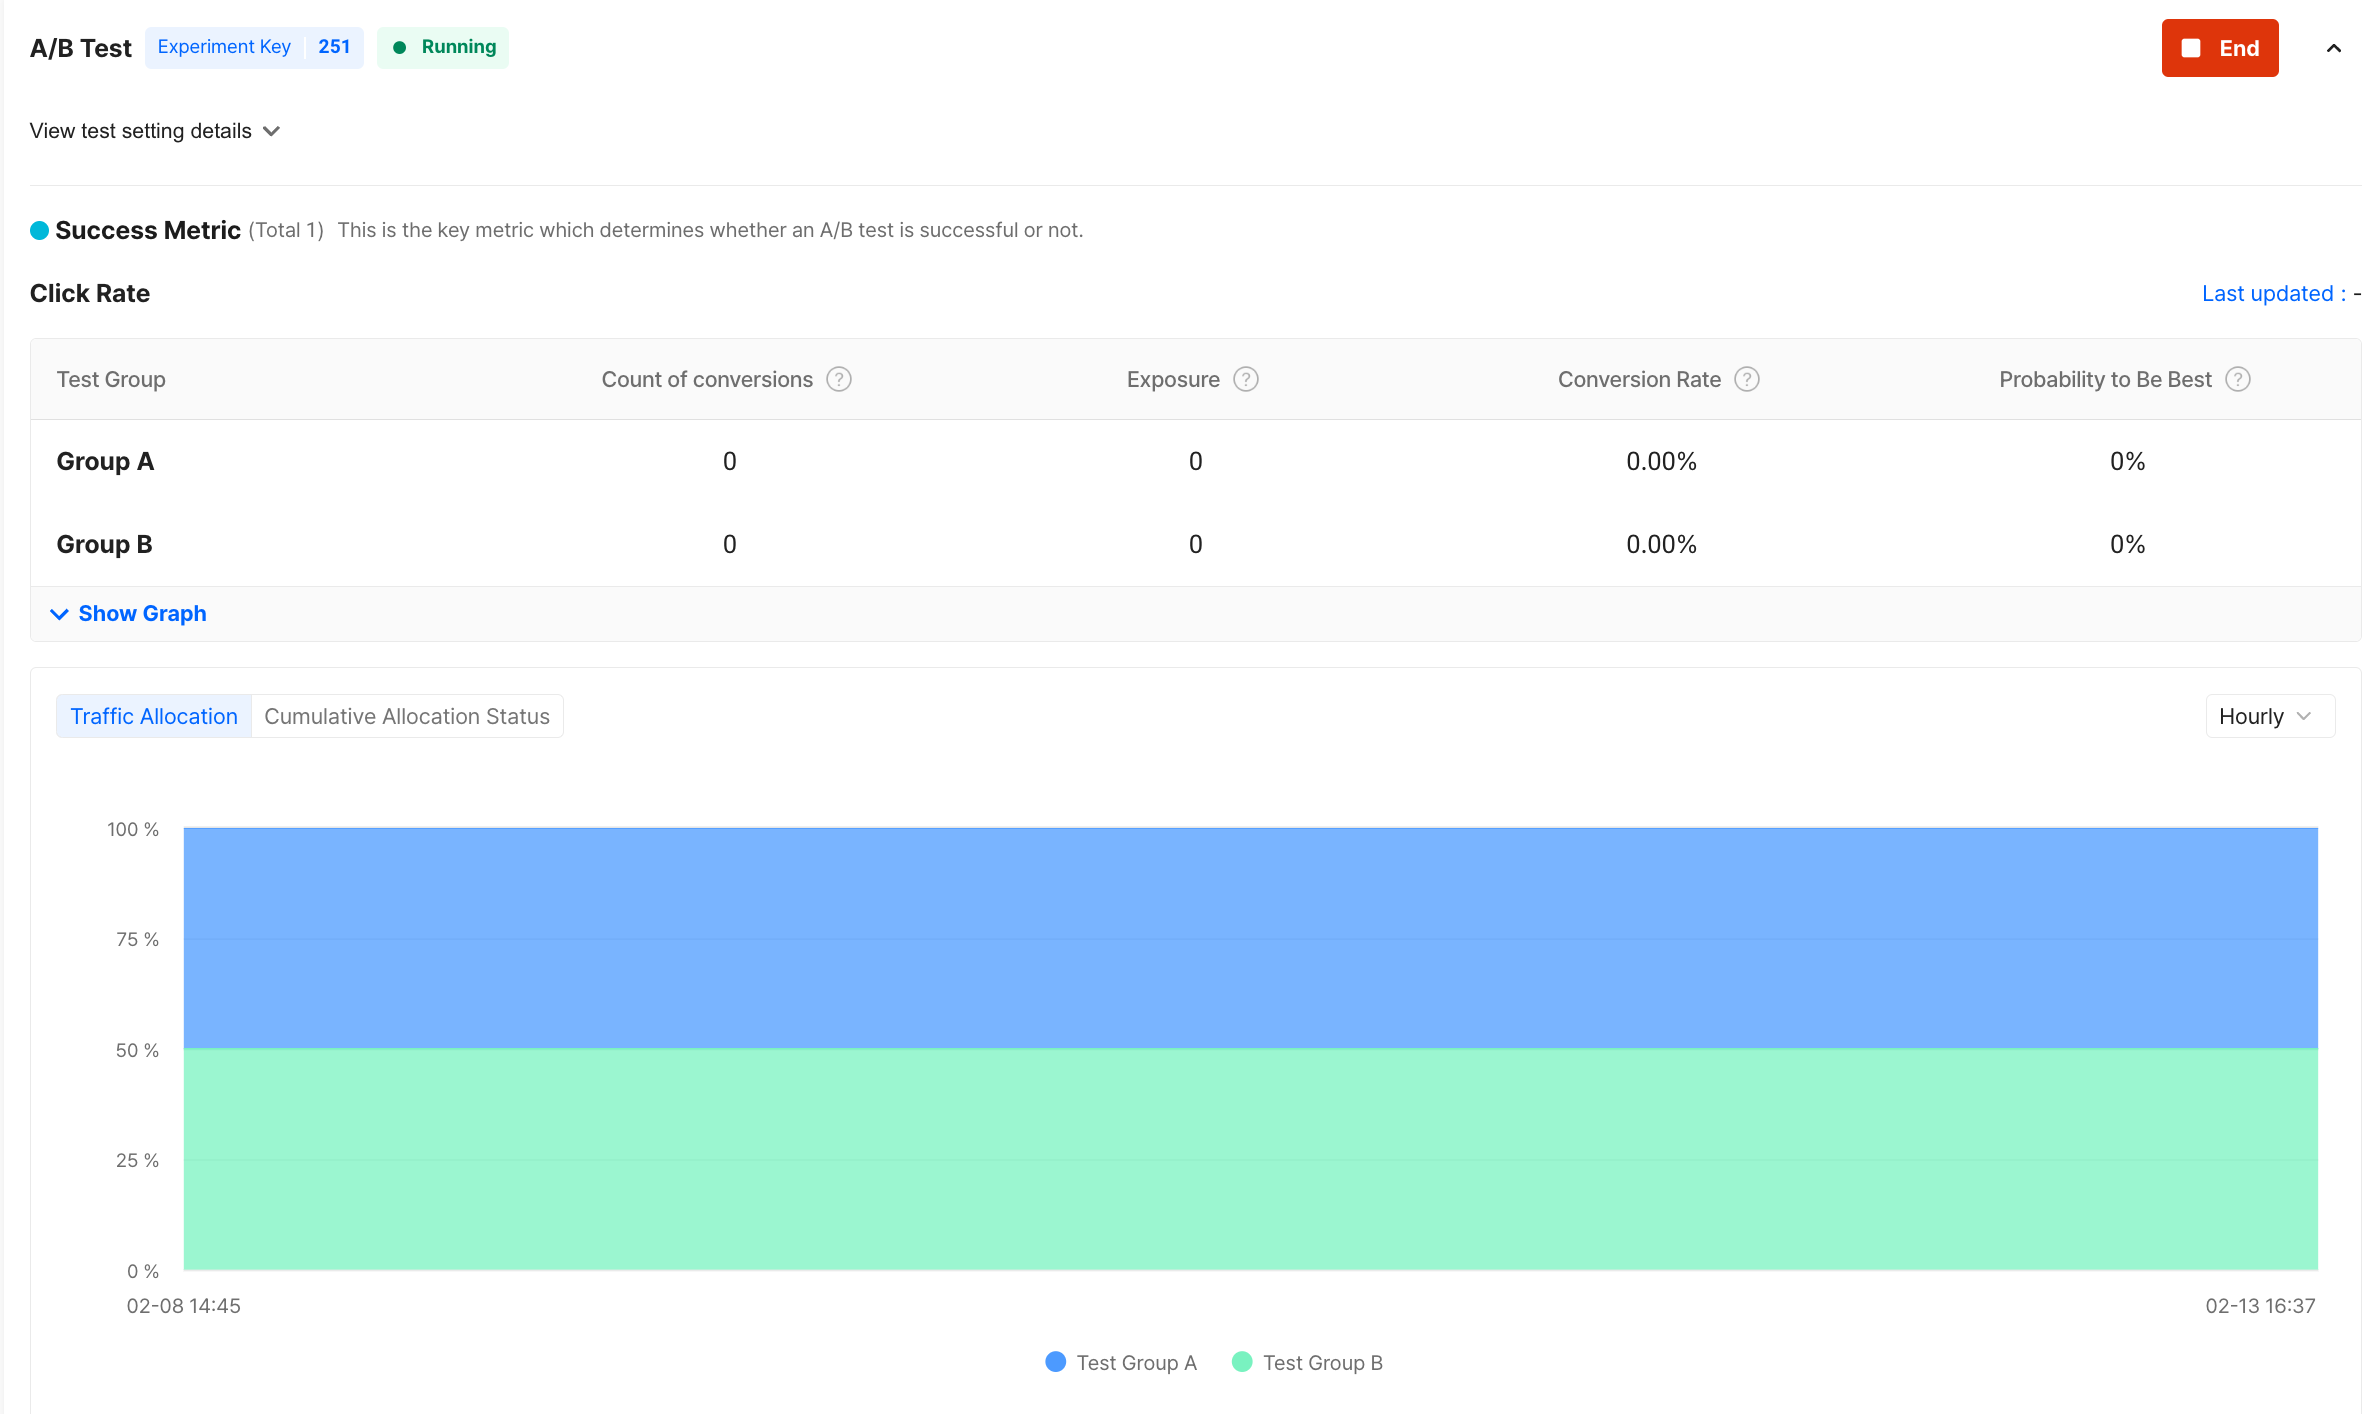
A/B Test Graph
- t
- E and If yo of A/B Test
- End : If you want to choose the best one after monitoring the performance of each message, you can click the d but button of the test (Red button). then the winner you choose will be exposed for targets.
- Pause : Press exposur button to pause the exposure of the message. then a/b test will be paused at the same time.
- End of exposure
- After the end of the experiment, press the pp me button to end the in-app message campaign.
Updated 8 months ago