Step 1: Create an A/B Test
Please note
Creating new A/B tests is possible in both the production and development environments.
(Creating an experiment in either environment will generate the same A/B test in the other environment.)Copy and use existing A/B tests
If the settings of the new A/B test you want to create share the same or similar characteristics as those of the previously created A/B test, you can easily create a new A/B test based on the old A/B test by copying the existing A/B test.
You can create a new A/B test by clicking the + Create a New A/B Testbutton located at the top right of the A/B Test menu on the dashboard.

Create a new A/B test
Creating new A/B tests is possible in both production and development environmentsCreating a new A/B test in either one of the two environments will generate the same A/B tests in the other environment.
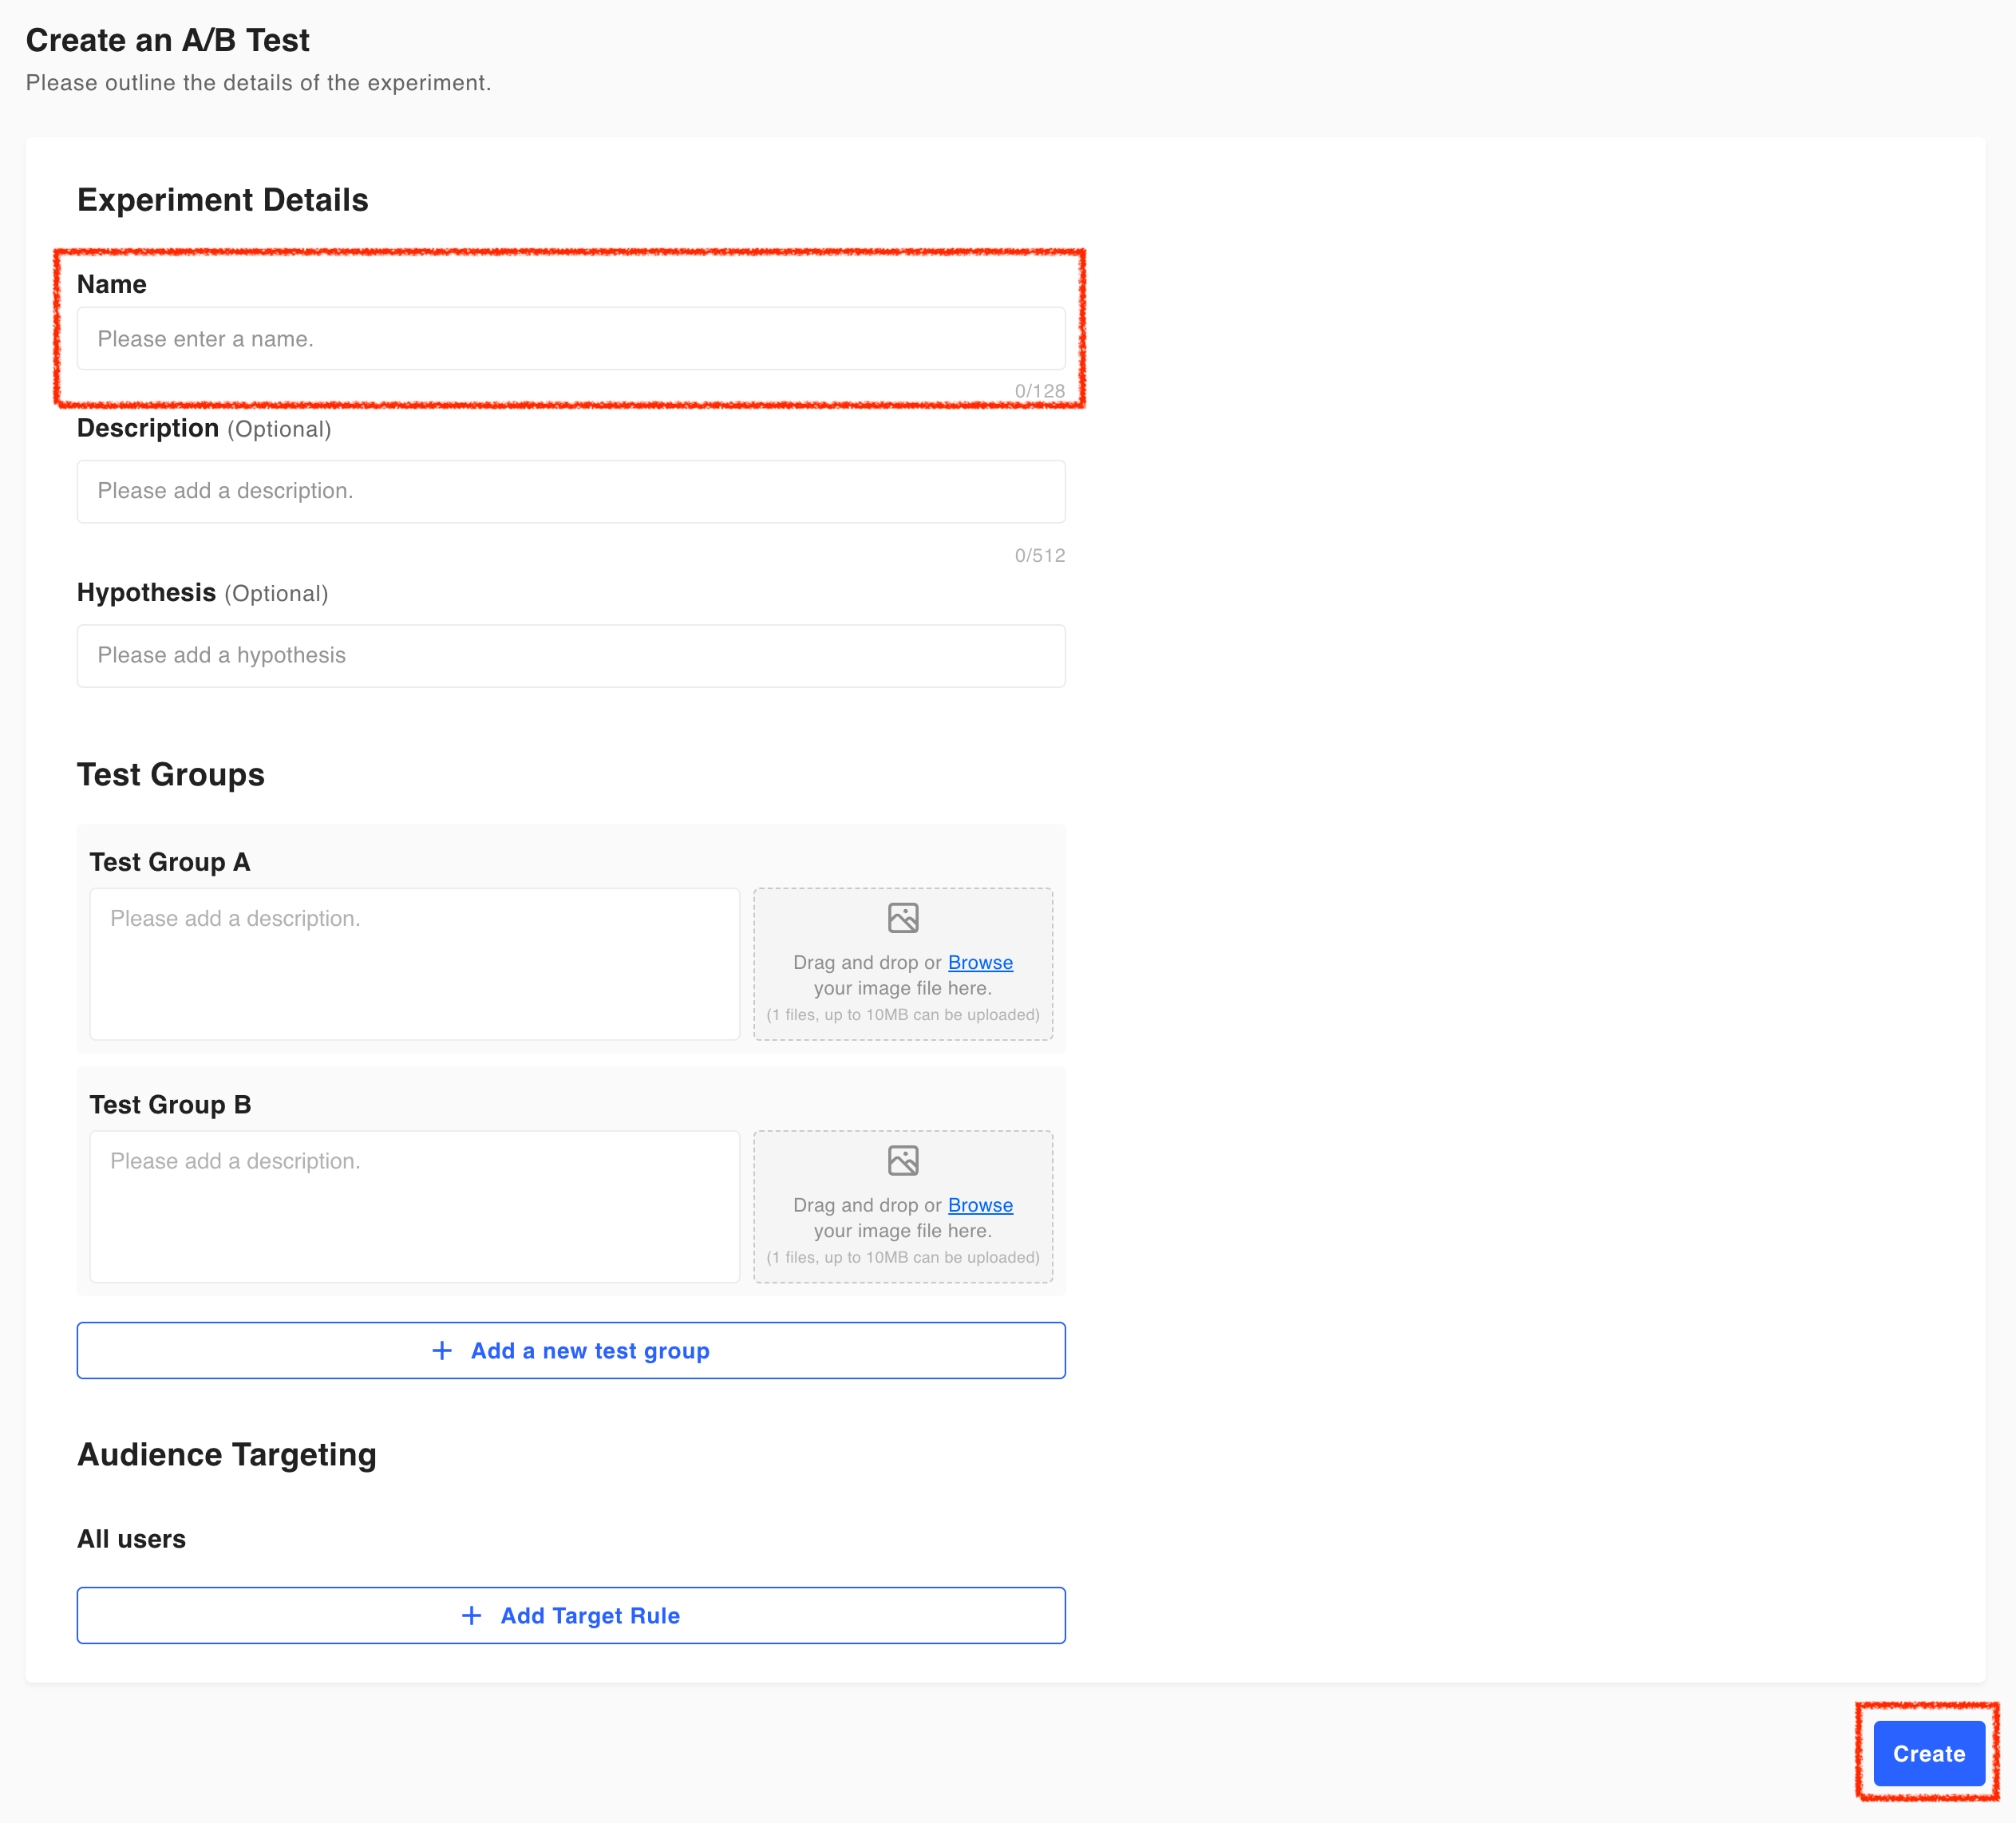
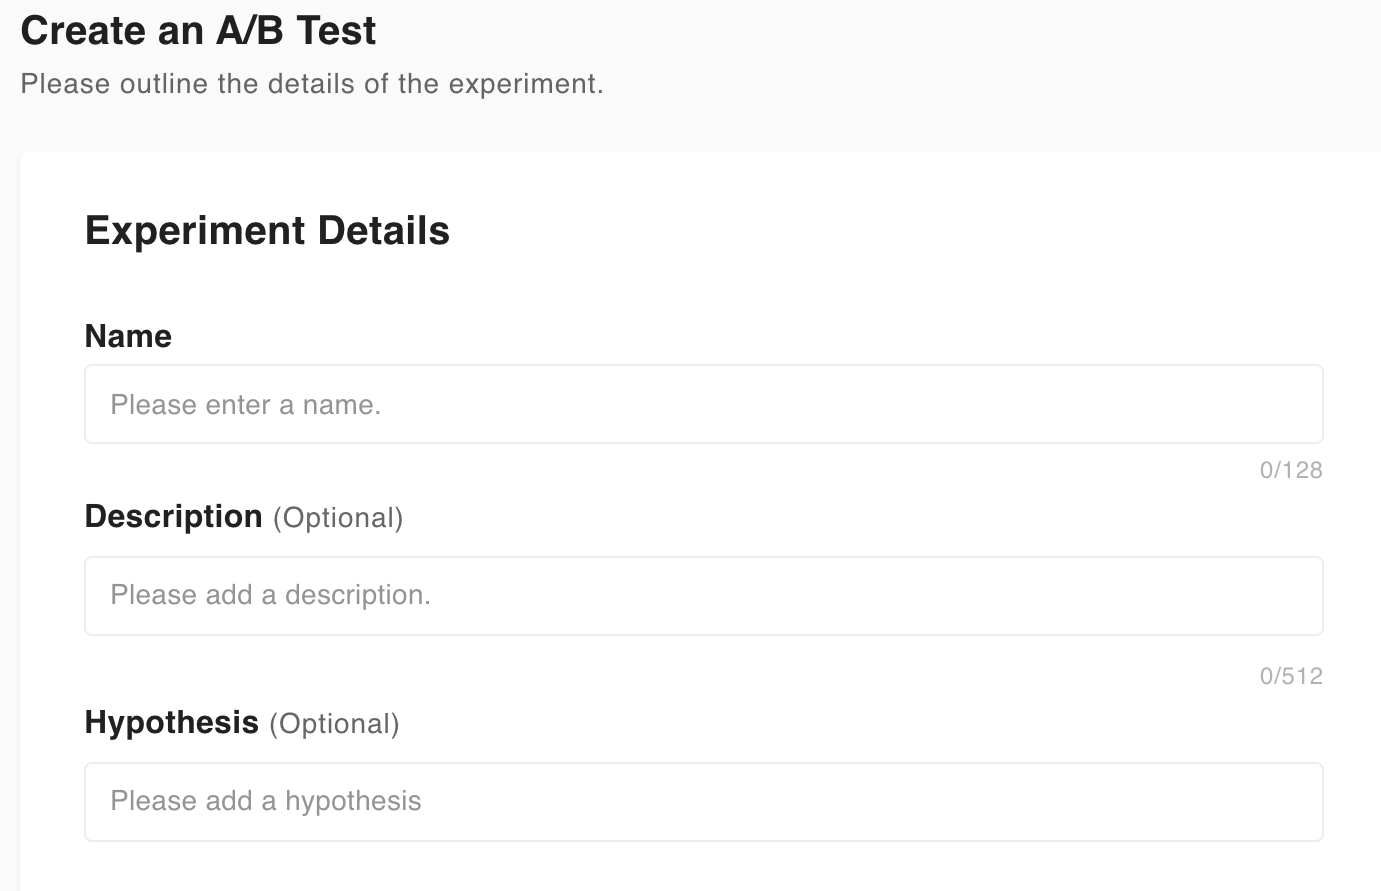
Step 1. Enter A/B Test Information
In the name entry, type in your chosen name of the A/B test.
The description is optional, but the explanation will help your other team members understand what type of A/B test is being conducted.

- A/B Test Name: Required. Enter the name of the A/B test you want to run.
- Description: Optional. Enter a description that helps other team members understand what this A/B test is about.
- Hypothesis: Optional. Enter the hypothesis you want to test via the A/B test.
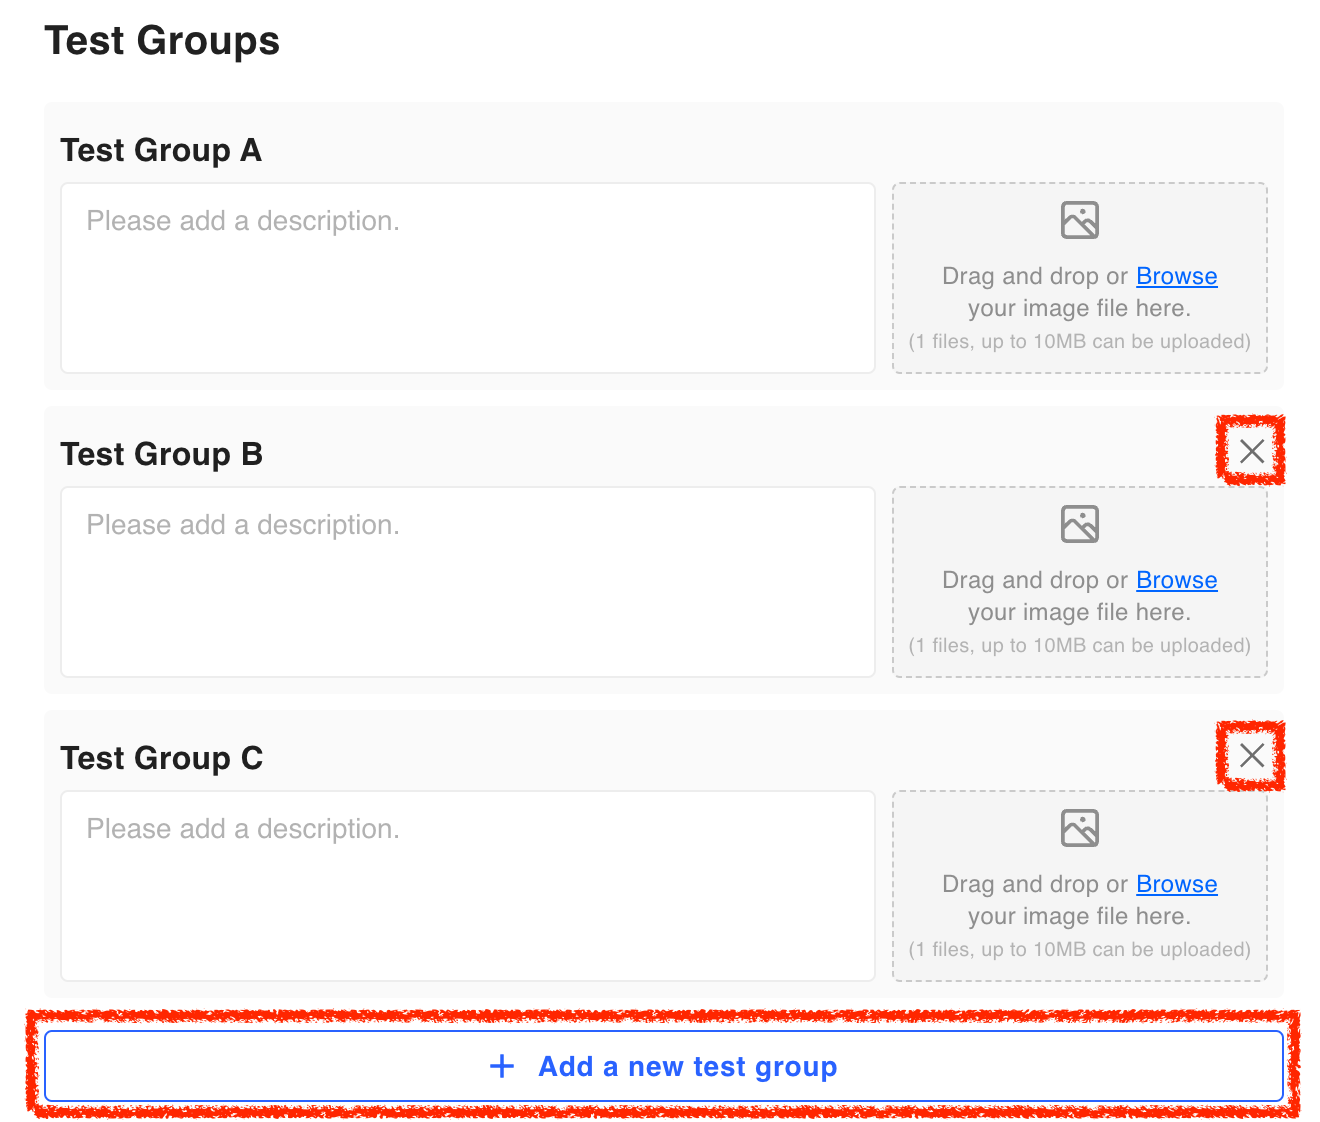
Step 2. Configuration of the Test Groups
Setting up a test group also means registering the existing control version and different versions included in the A/B test.
Before starting the A/B test, the users that are exposed to the current control version of the page (website, app) will be classified as Test Group A, and the users exposed to the added versions they want to experiment with will be classified as Test Group B, C, ... You can add a test group by clicking the + Add a new test group button at the bottom left.
Deleting a test group is possible for all groups excluding the control Test Group A if there are more than three groups. You can delete a test group with the - button on the right.

Add a new test group
Step 3. Audience Targeting (Optional)

If you would like to limit your experiment to users with specific attributes or properties to participate in the A/B test, you can set up audience targeting rules.
For more information on targeting settings, please refer to the Step 3: Set Targeting (optional) document.
Step 4. Create an A/B Test
When you have finished setting up the test group, press the Create button in the lower right corner. You have now created a successful A/B test.
Next steps
The next steps are setting up metrics and connecting your digital product to the Hackle server via SDK (if you haven't already done so in the prerequisite steps). Please refer to the document below for each step. You need to complete your SDK Integration before you set the metrics for the A/B test.
Updated 6 months ago
