Push Message A/B Test
If you want to find the most effective push notification campaign creatives, utilize A/B test.You can compare and analyze which message drives higher user engagement under the same conditions to optimize your campaign.
Step 1. Creating A/B Test Messages
Click [+ A/B Test] while composing a message to set up experiments and create multiple messages.
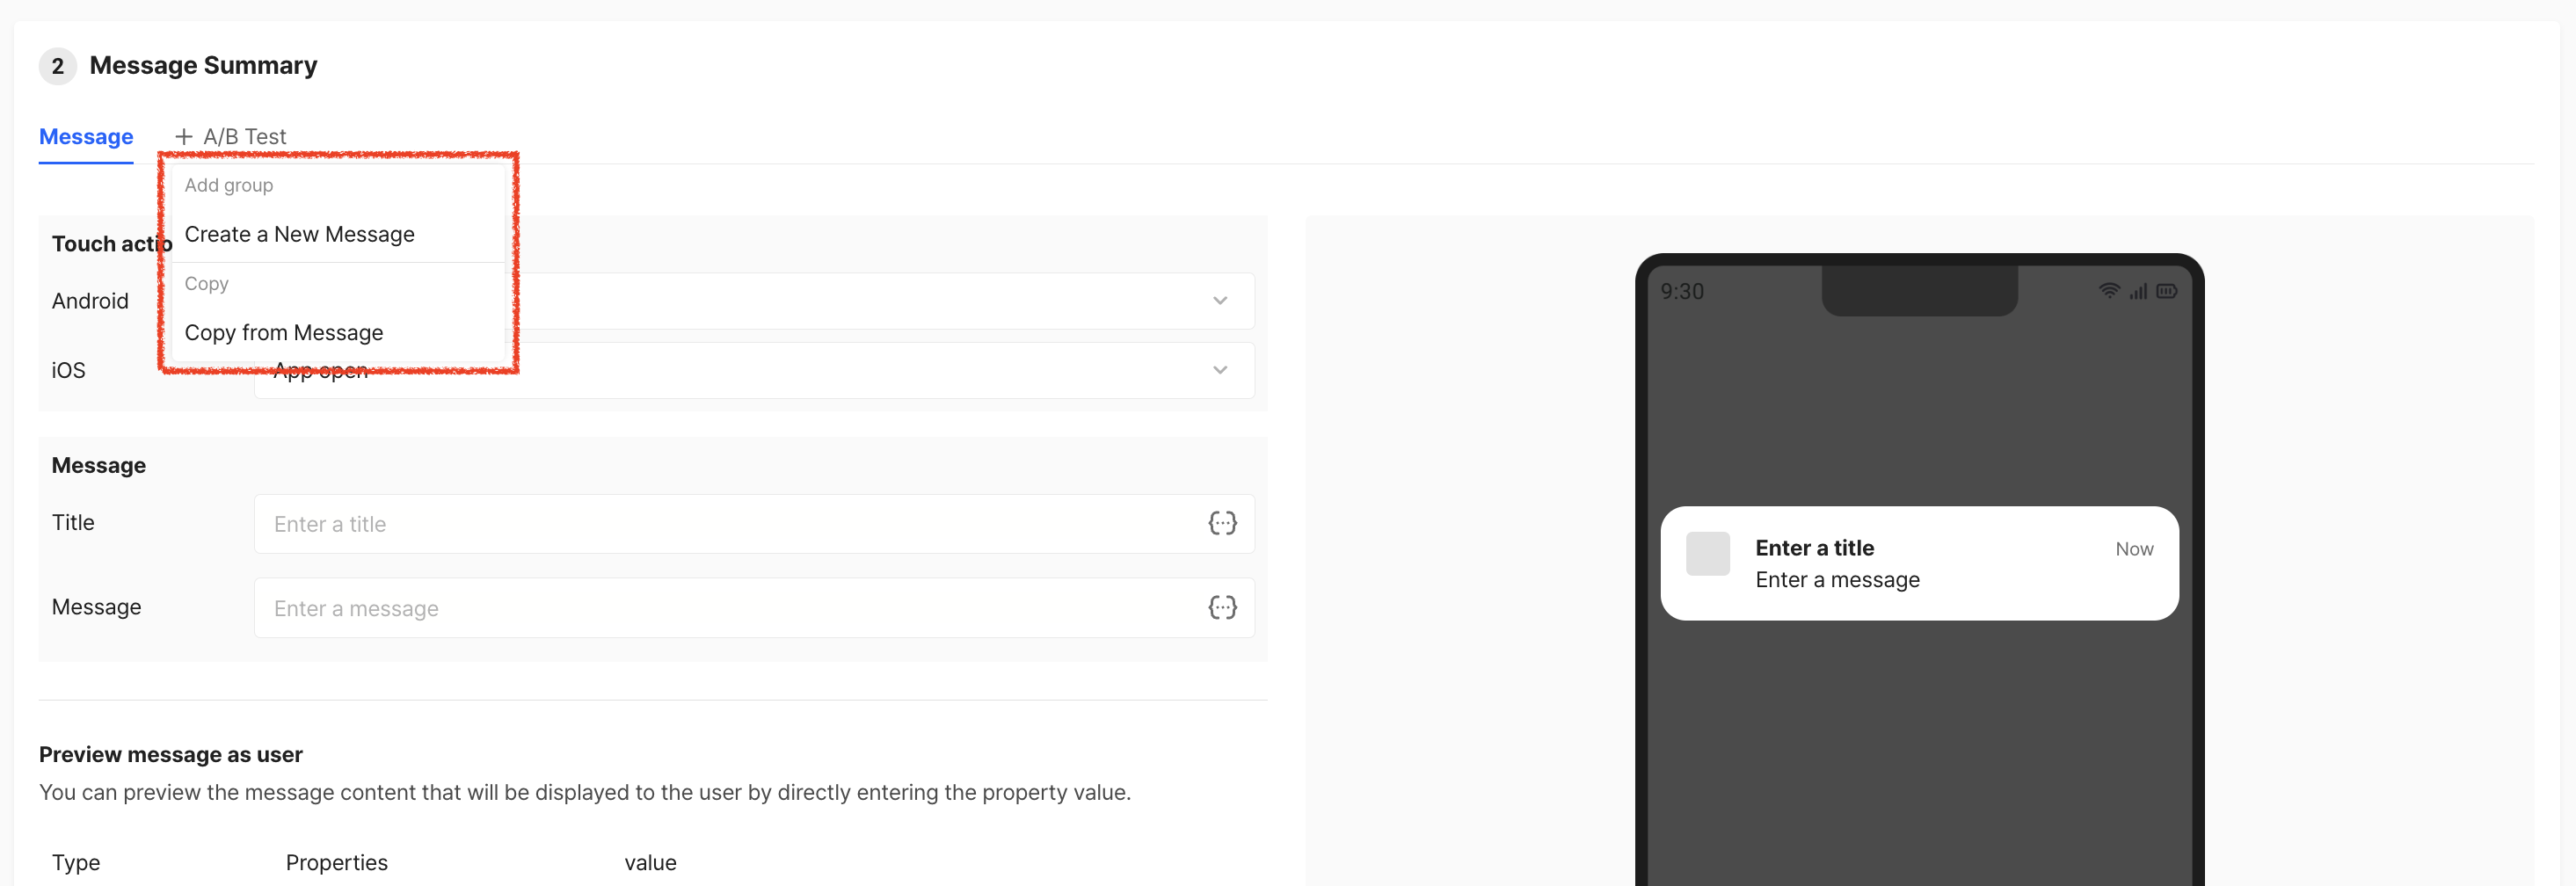
You can create new messages or copy the one you are currently working on to create multiple variations for A/B testing. You can add up to 10 messages.
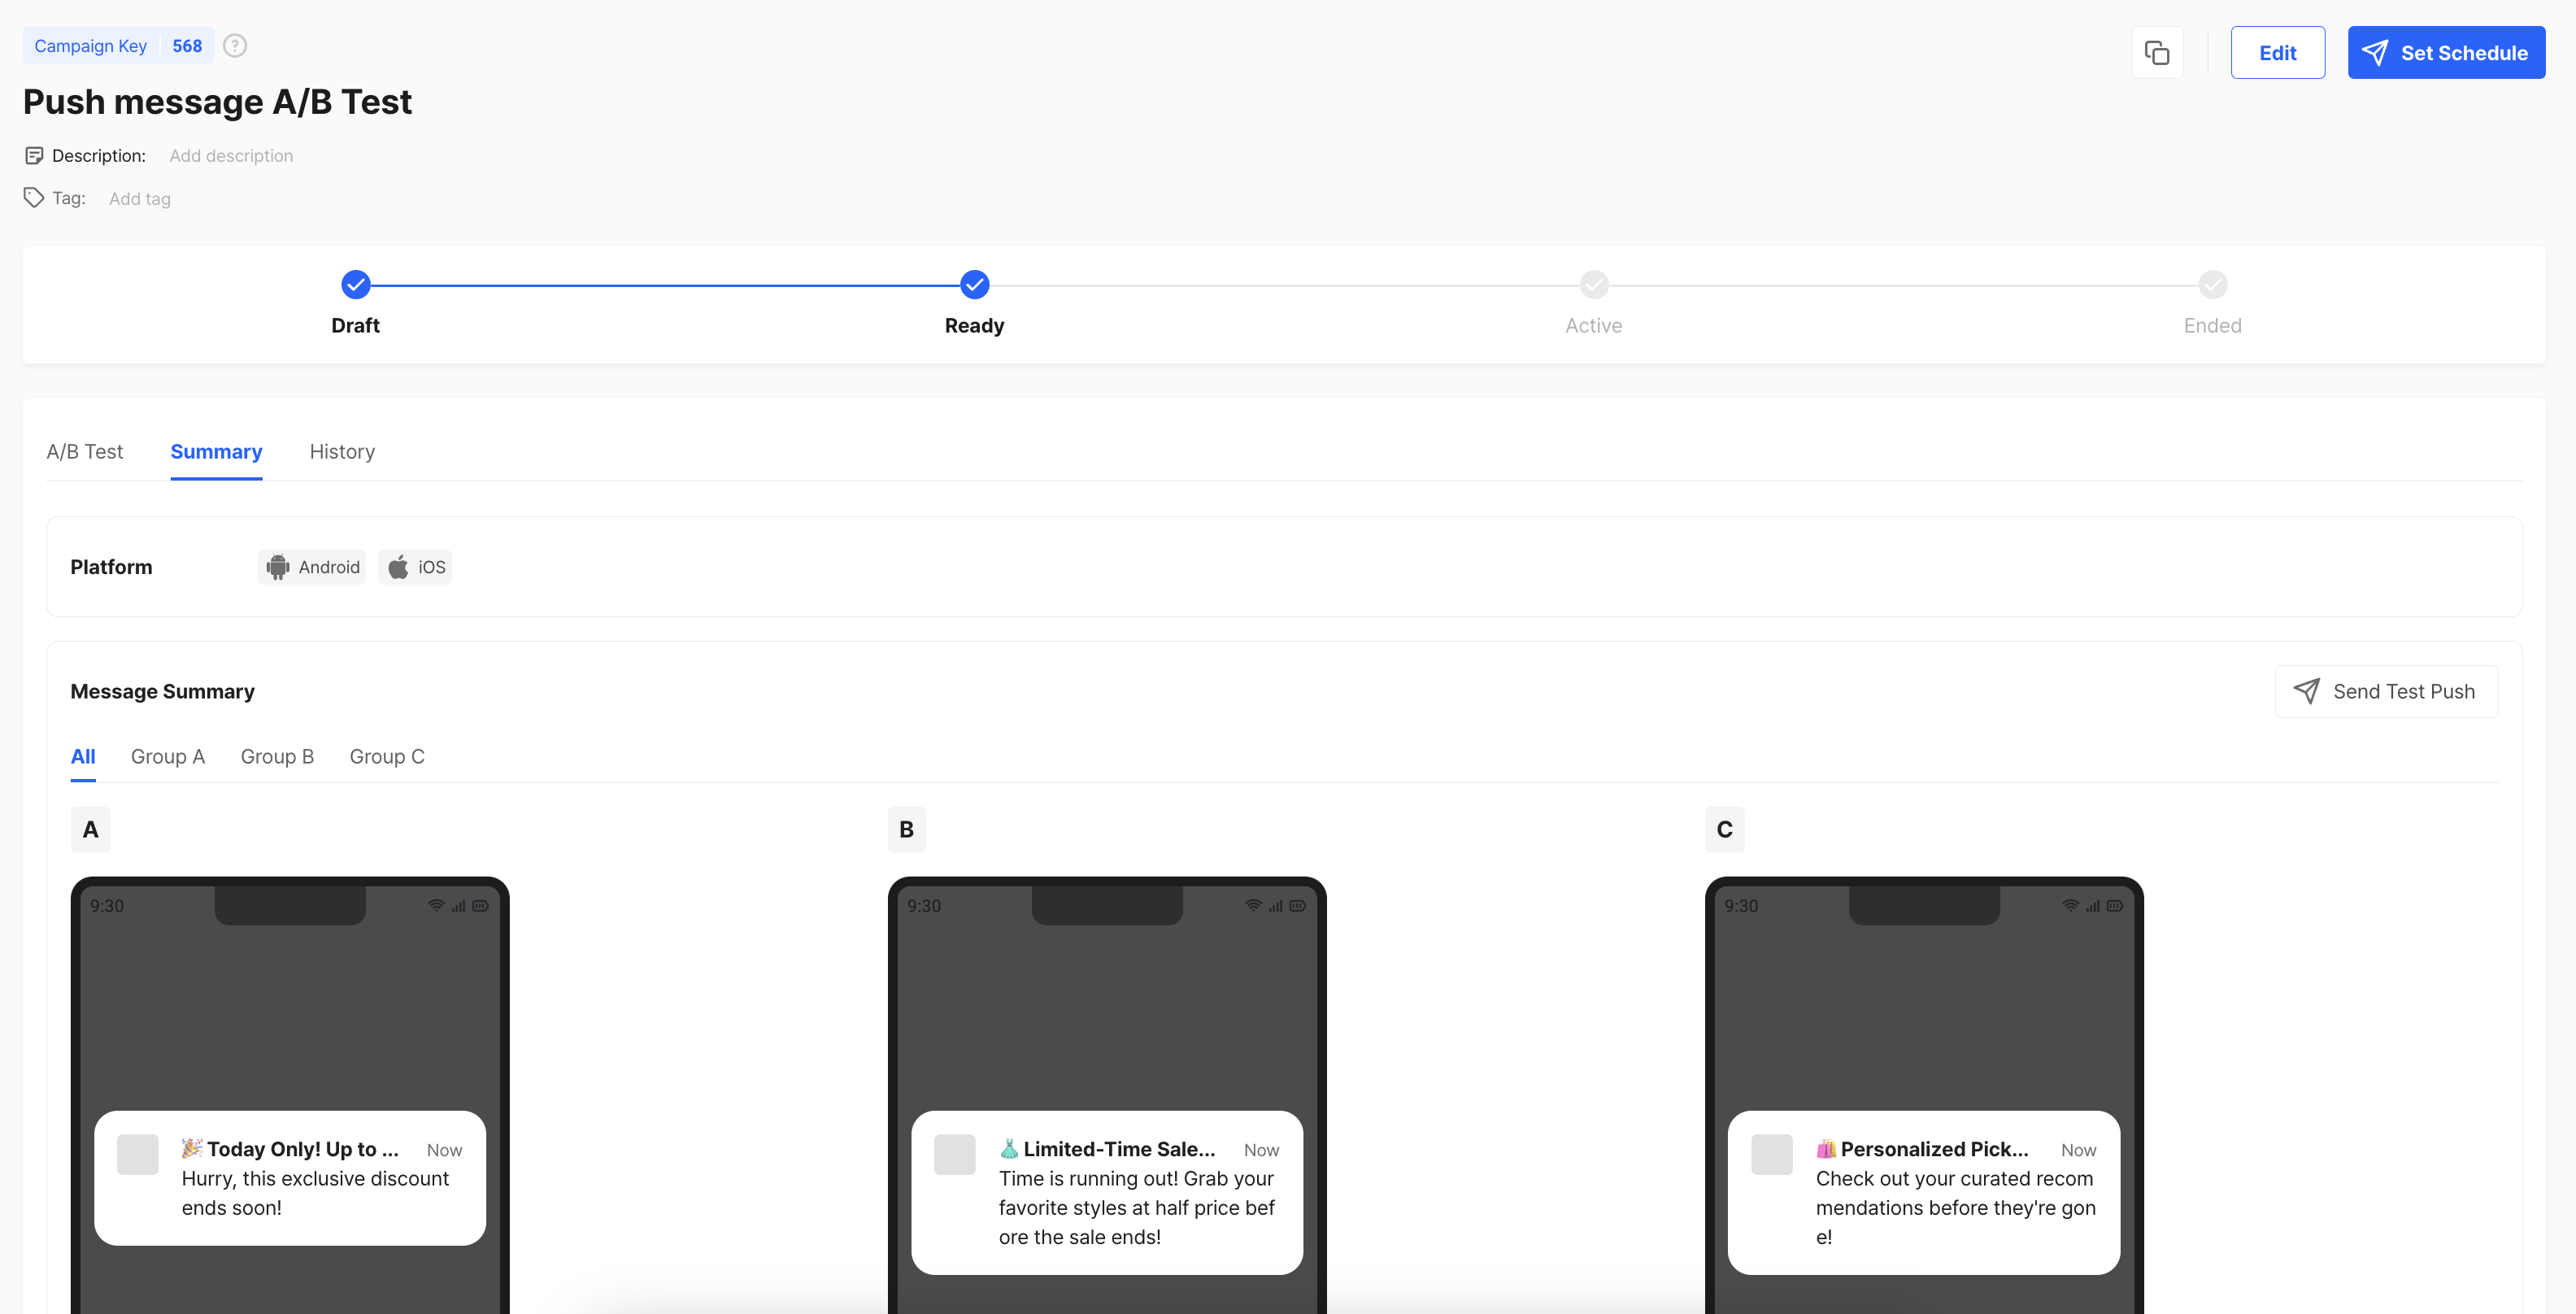
Success Metrics
A/B test evaluates the performance of each message based on its success metrics. For push notification A/B test, message click-through rate (CTR) is supported by default.
- Message Click-through Rate: The percentage of the total number of messages clicked compared to the total number of push notifications sent successfully.

Step 2. A/B Test Setup
The A/B test begins when the push message is sent. You can continue configuring detailed settings in the 'Set Schedule'.

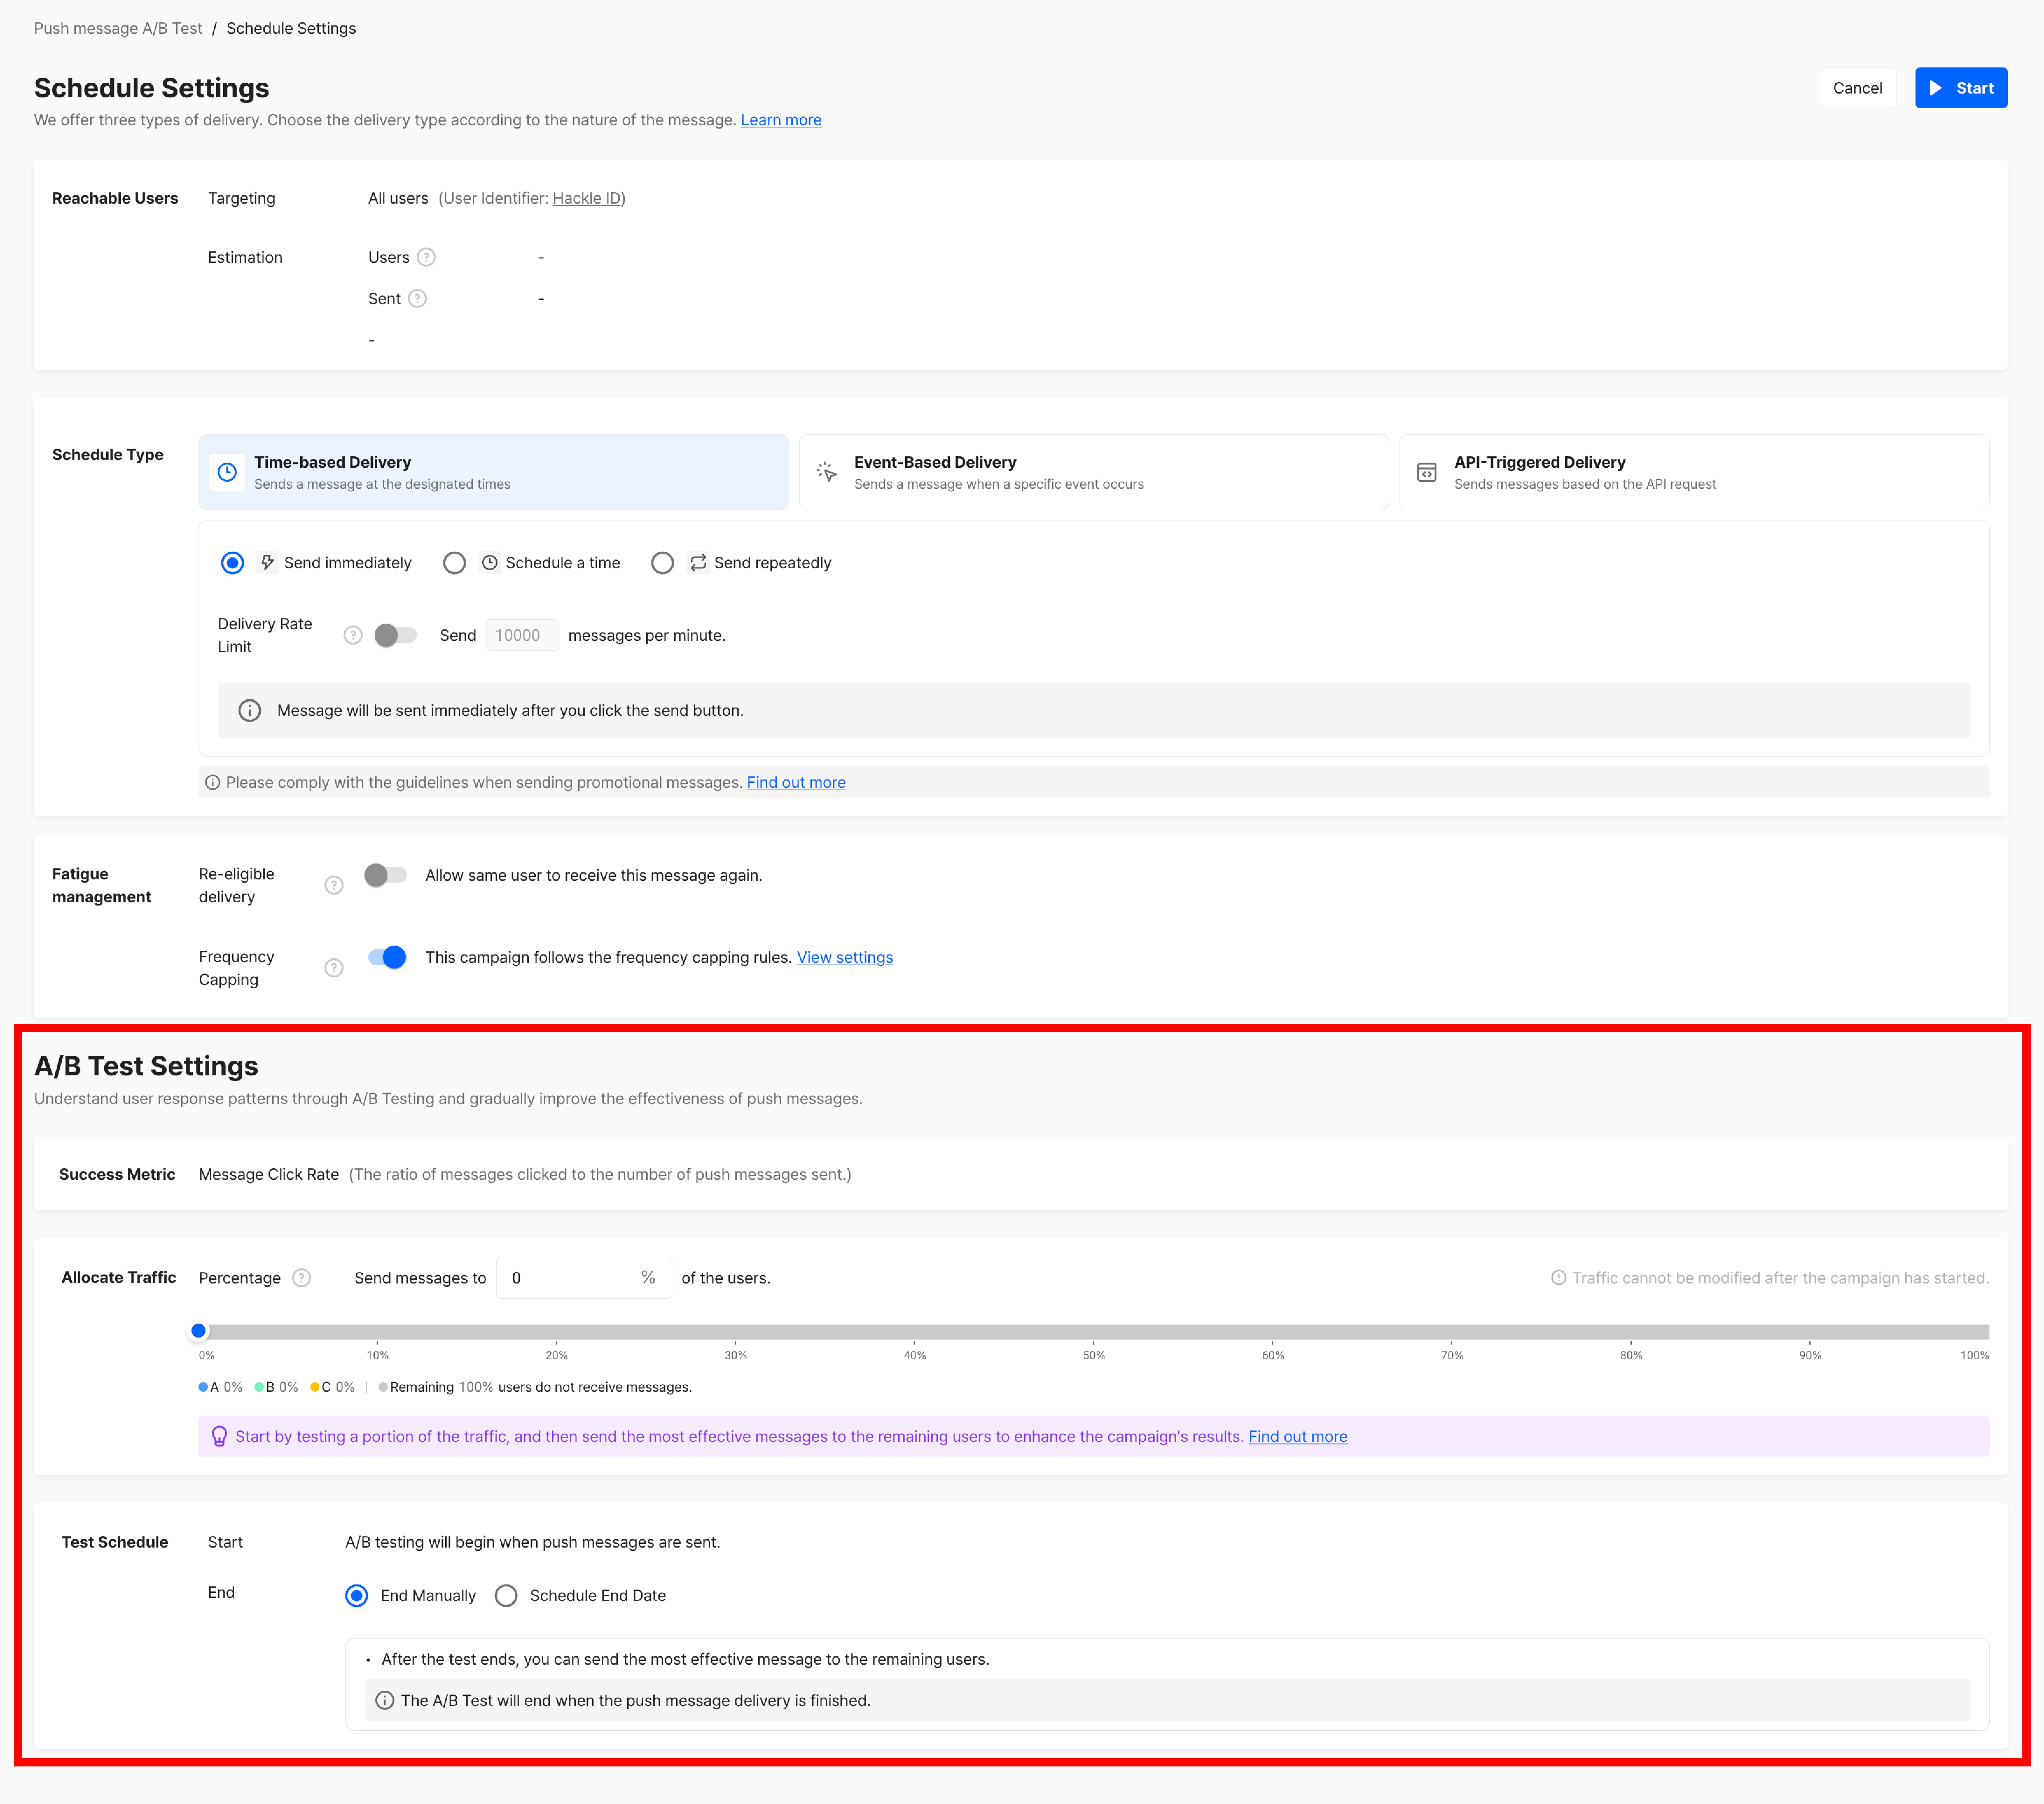
2-1. Traffic Allocation
Set the traffic percentage of users to receive the A/B test messages.

- Conduct an initial test with a portion of the traffic, then send the best-performing message to the remaining users to optimize campaign results.
- Run the test with the entire traffic to evaluate preferences for the message creatives.
2-2. Test Schedule

- Start: The A/B test begins when the push messages sent.
- End: The A/B test ends when the push message campaign ends.
- End Manually: You can manually end the test after reviewing the campaign results.
- Schedule End Date: Set a predefined the test end date.
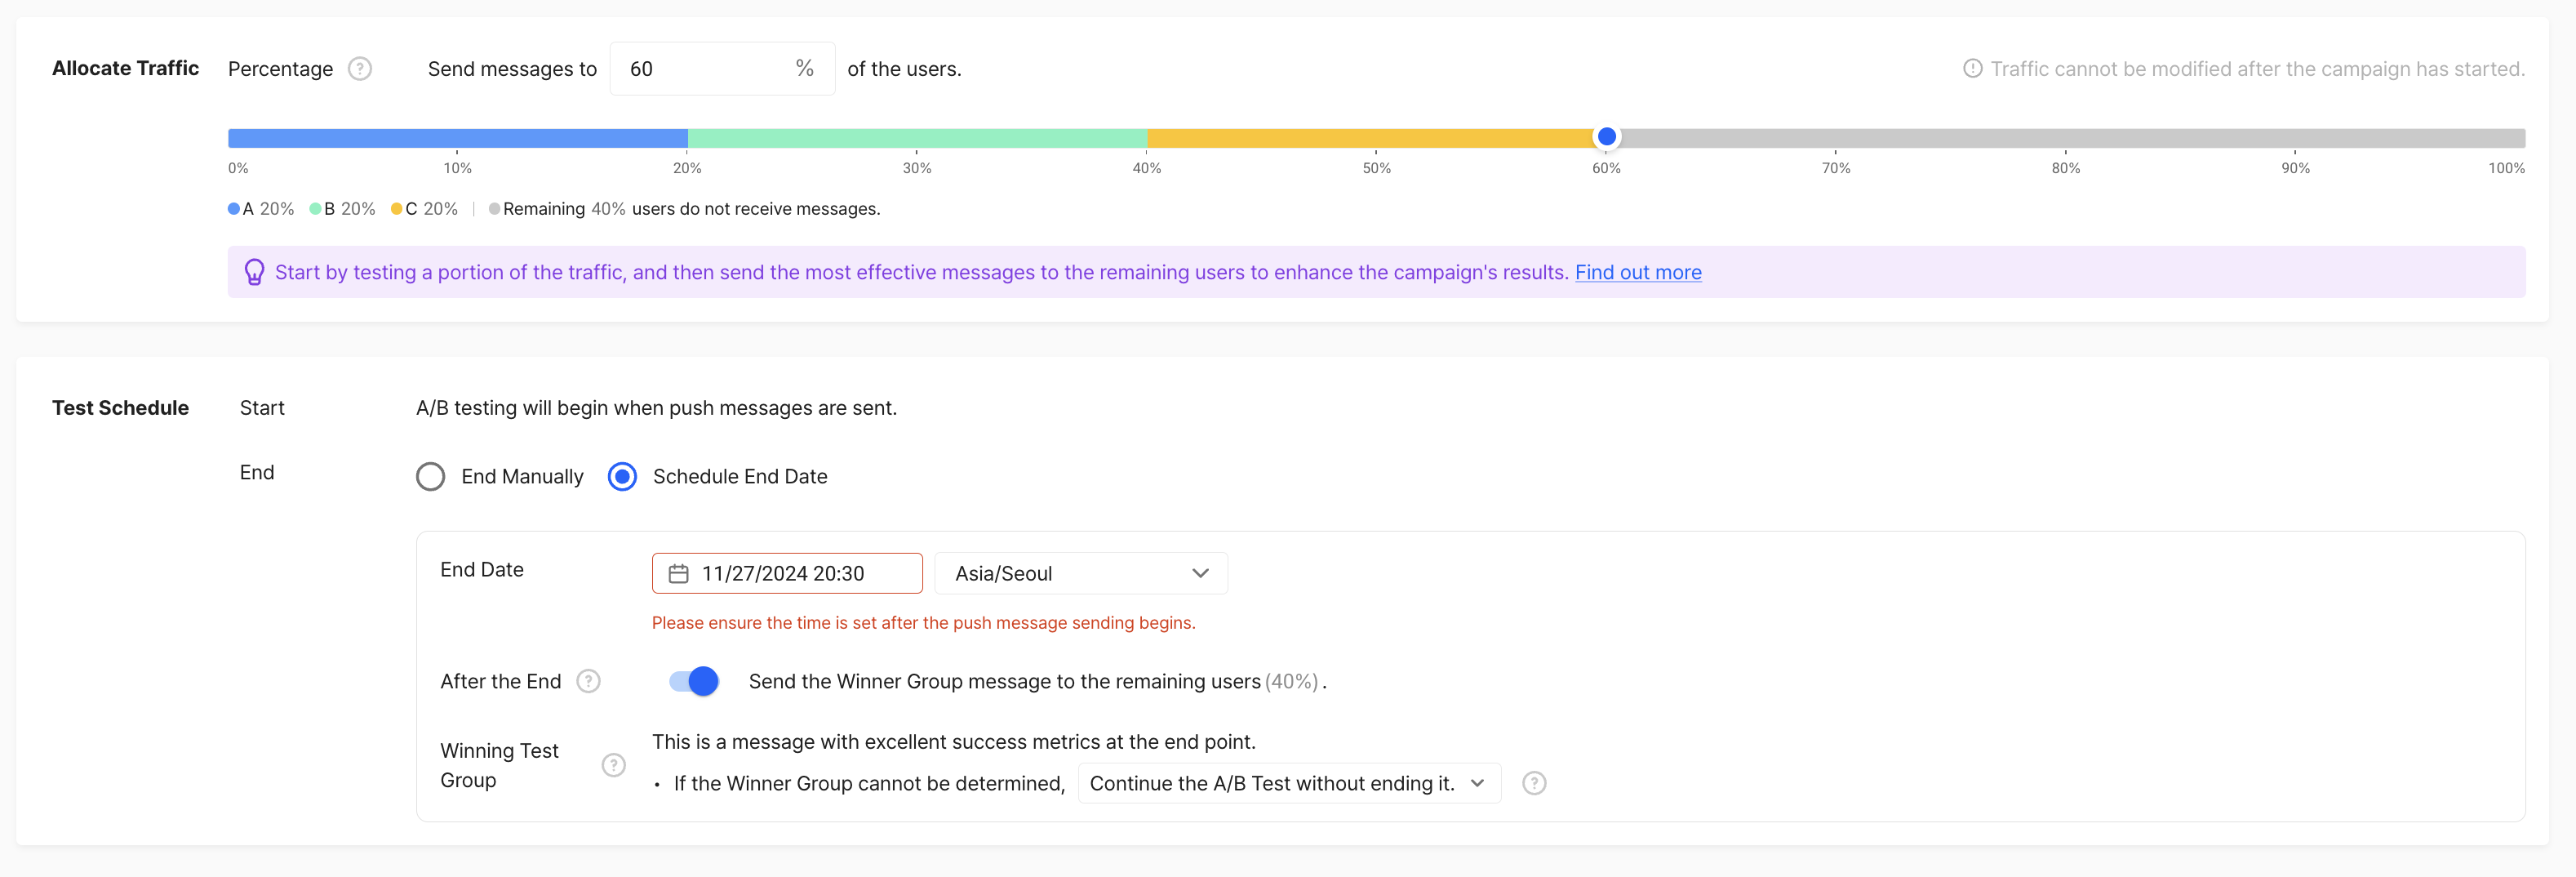
When scheduling a test end, you can choose whether to send the best-performing message (Winner group) to the remaining traffic after the test concludes.
- Winner Group Selection Criteria
- The group with the best success metric will be designated as the Winner group, concluding the test.
- If set to send to the remaining users, the Winner group’s message will be delivered to the remaining traffic.
- For recurring messages, the Winner group’s message will be sent to all users.
Step 3. Starting A/B Test
The A/B test begins when the push messages are sent. Test results can be reviewed within 2 hours after sending.
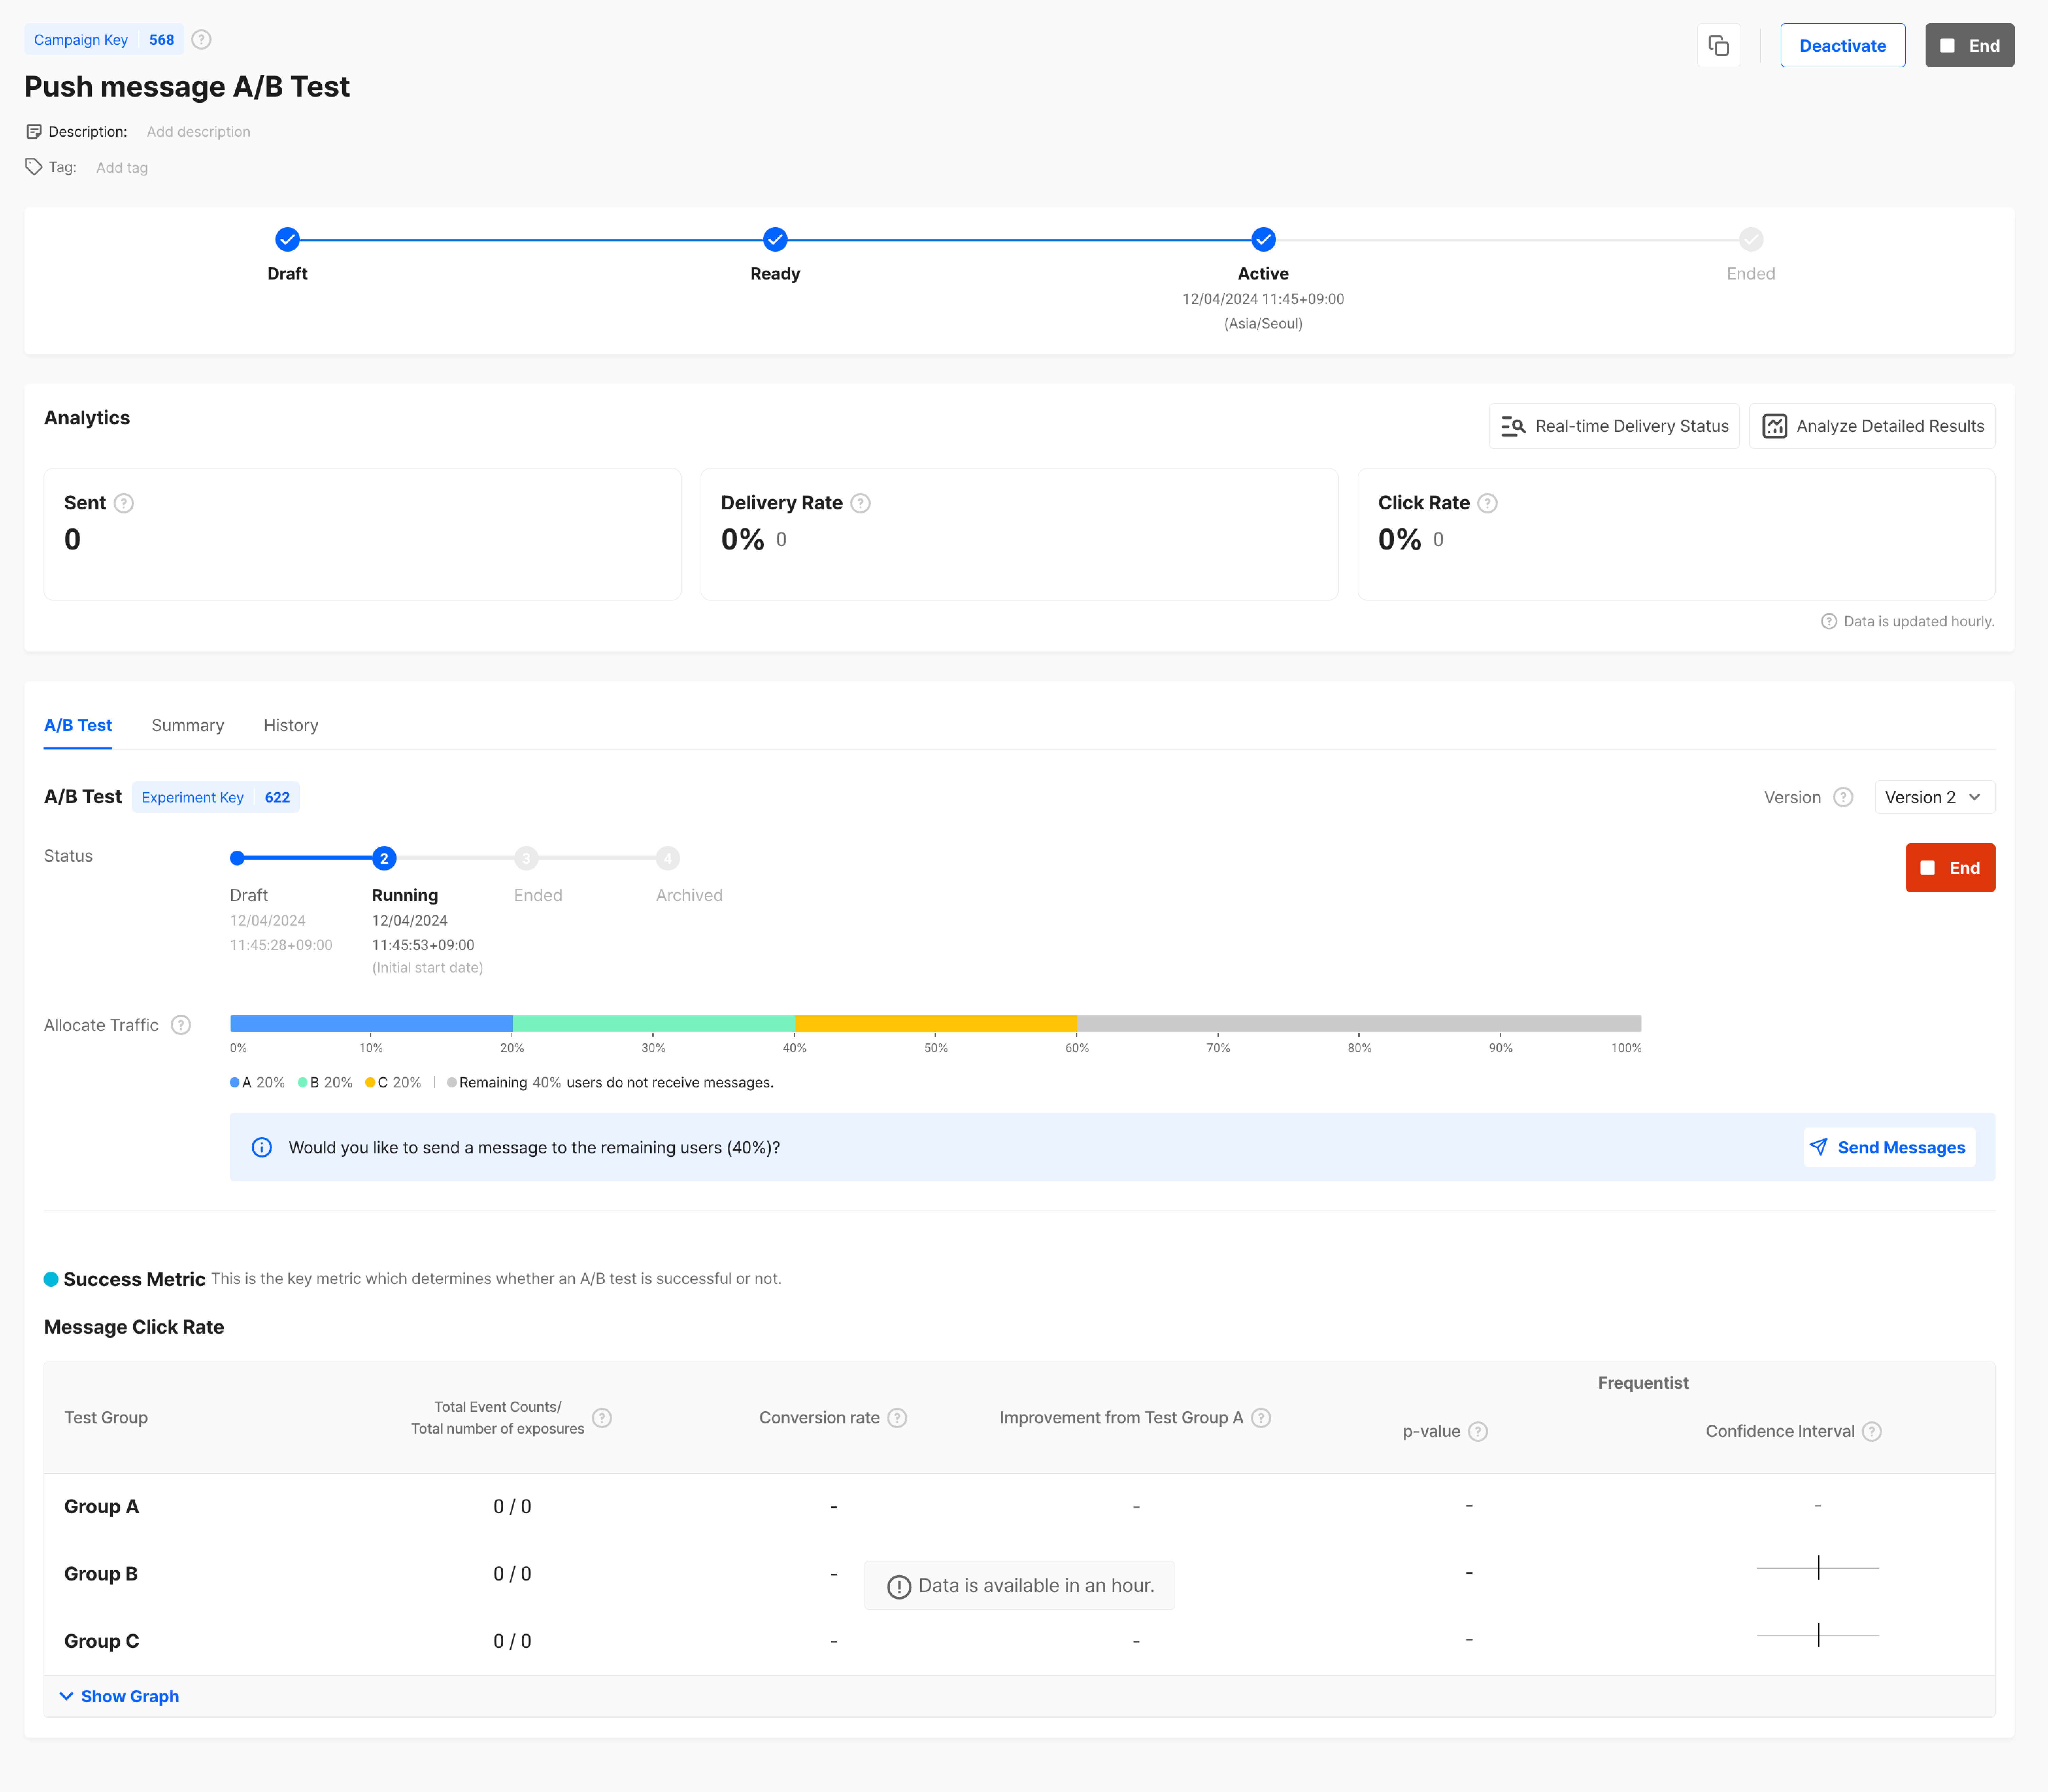
Active push notifications
Deactivating the campaign will terminate the ongoing A/B test.
You can modify the push message content after deactivating the campaign. Resending will automatically create a new version of the A/B test.
Results from previous versions are saved separately, allowing you to review data for each version.

Ongoing A/B test version ended

View data for previous versions
Step 4. Ending A/B Test
The status of the A/B test and the push message campaign can be configured separately.
- After reviewing the performance, you can click st-pe to select the best-performing message as a winner (Winner Group).
- For recurring messages, the message will continue to be sent even if the A/B test is ended as long as the campaign is still active.
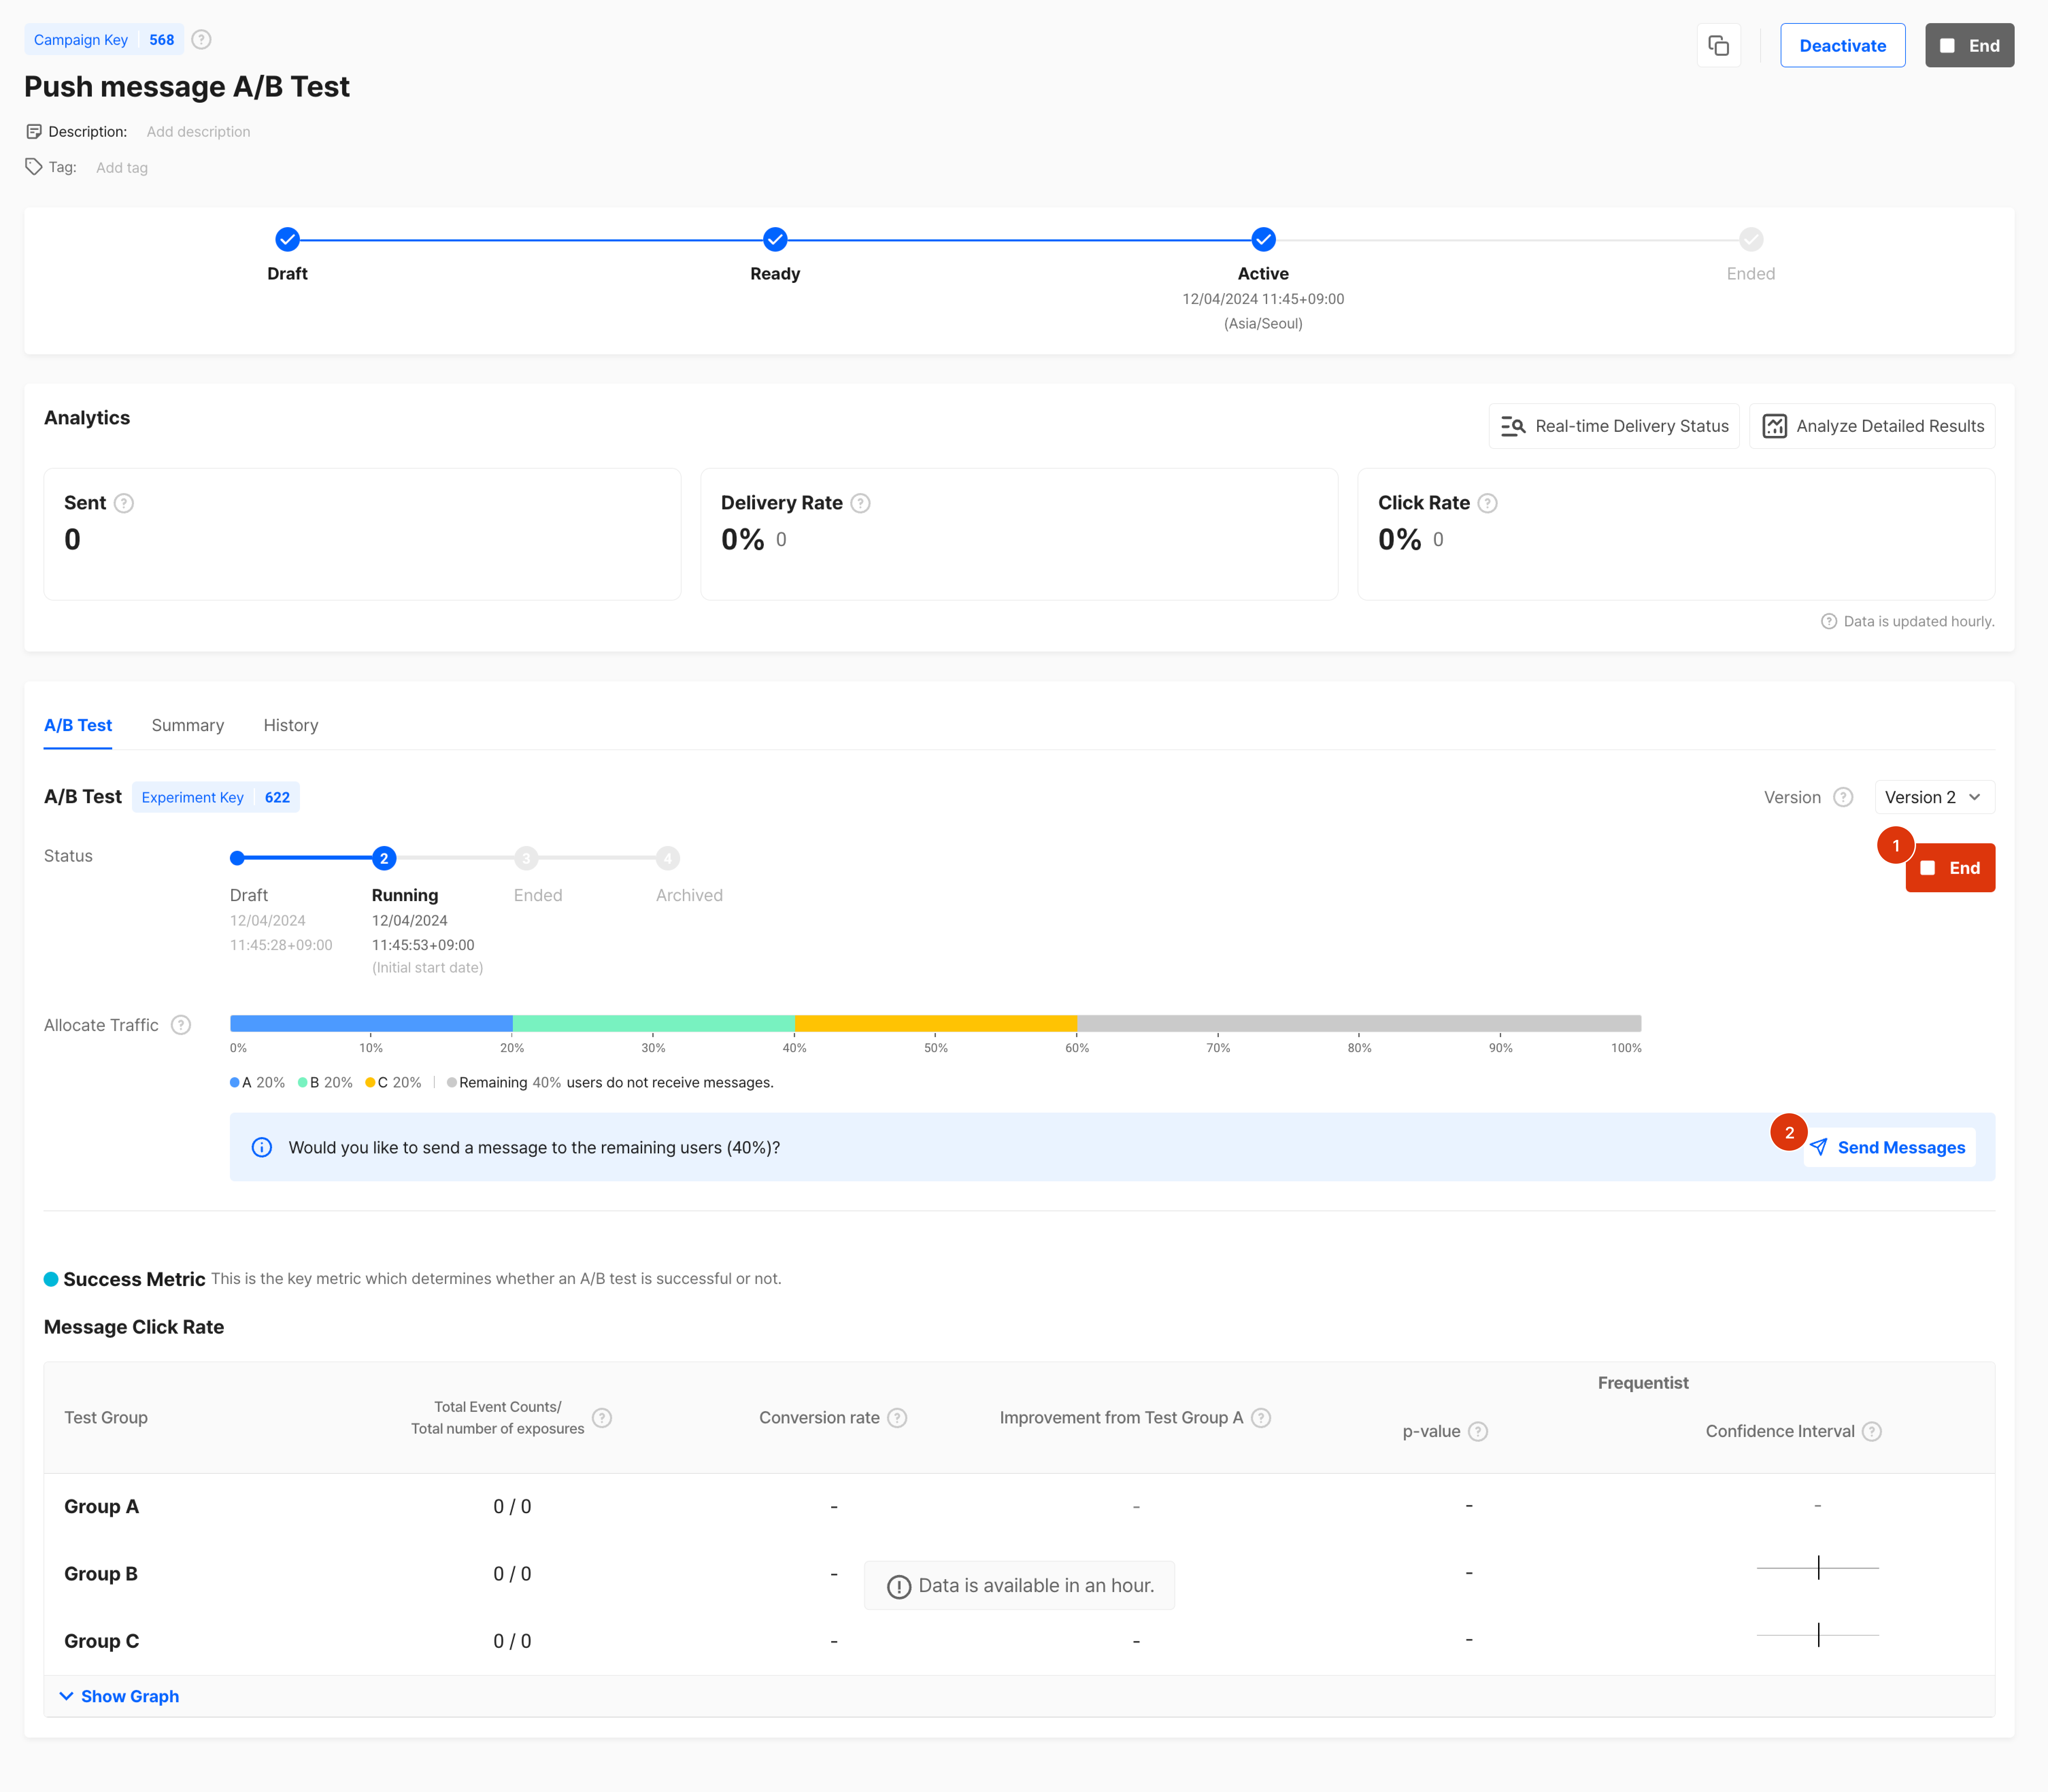
- End Test
You can end the ongoing A/B test by clicking the End button. - Send Messages
If you conducted the A/B test with a portion of the traffic, you can send the best-performing message to the remaining users.- Scheduled (Immediate or Scheduled Delivery): The message is sent to the configured traffic first, and then to the remaining traffic.
- Scheduled (Recurring Delivery), Event-Based, API-Based: The Winner group message will be sent to all users.
Click the right button at the top right of the screen to end the push message campaign.
Updated 6 months ago
